

The kitchen windows fog with sweet condensation as the scent of peppermint wafts through the air. Memories of holiday baking sessions flood back—tiny hands covered in chocolate, laughter echoing through the kitchen, and the anticipation of that first creamy bite of Christmas fudge. This simple yet magical Christmas fudge recipe has been part of our family’s holiday tradition for generations, bringing joy with every colorful, minty square.
Did you know that fudge became popular in America in the late 19th century, with the first documented reference appearing around 1886? Nearly 65% of all homemade fudge in the United States is prepared during the holiday season, making Christmas fudge recipe searches spike by over 300% each December!
Table of Contents
Why This Christmas Fudge Recipe Stands Out
This Christmas fudge recipe strikes the perfect balance between simplicity and festive flair. With just a handful of ingredients and minimal active preparation time, you’ll create a show-stopping holiday treat that looks as though it required professional pastry skills. The vibrant red and green swirls nestled in creamy white chocolate perfectly capture the Christmas spirit.
For those looking to explore more holiday fudge variations, there are countless inspirations available. Betty Crocker offers a 109 Easy Chocolate Desserts that’s incredibly beginner-friendly. Delish features their Cake Mix Fudge Crinkle Cookies with rich chocolate variations. For the time-pressed baker, consider checking out 3 Minute Fudge or Paula Deen’s 5 Minute Fudge for quick alternatives.
Christmas Fudge Recipe Ingredients
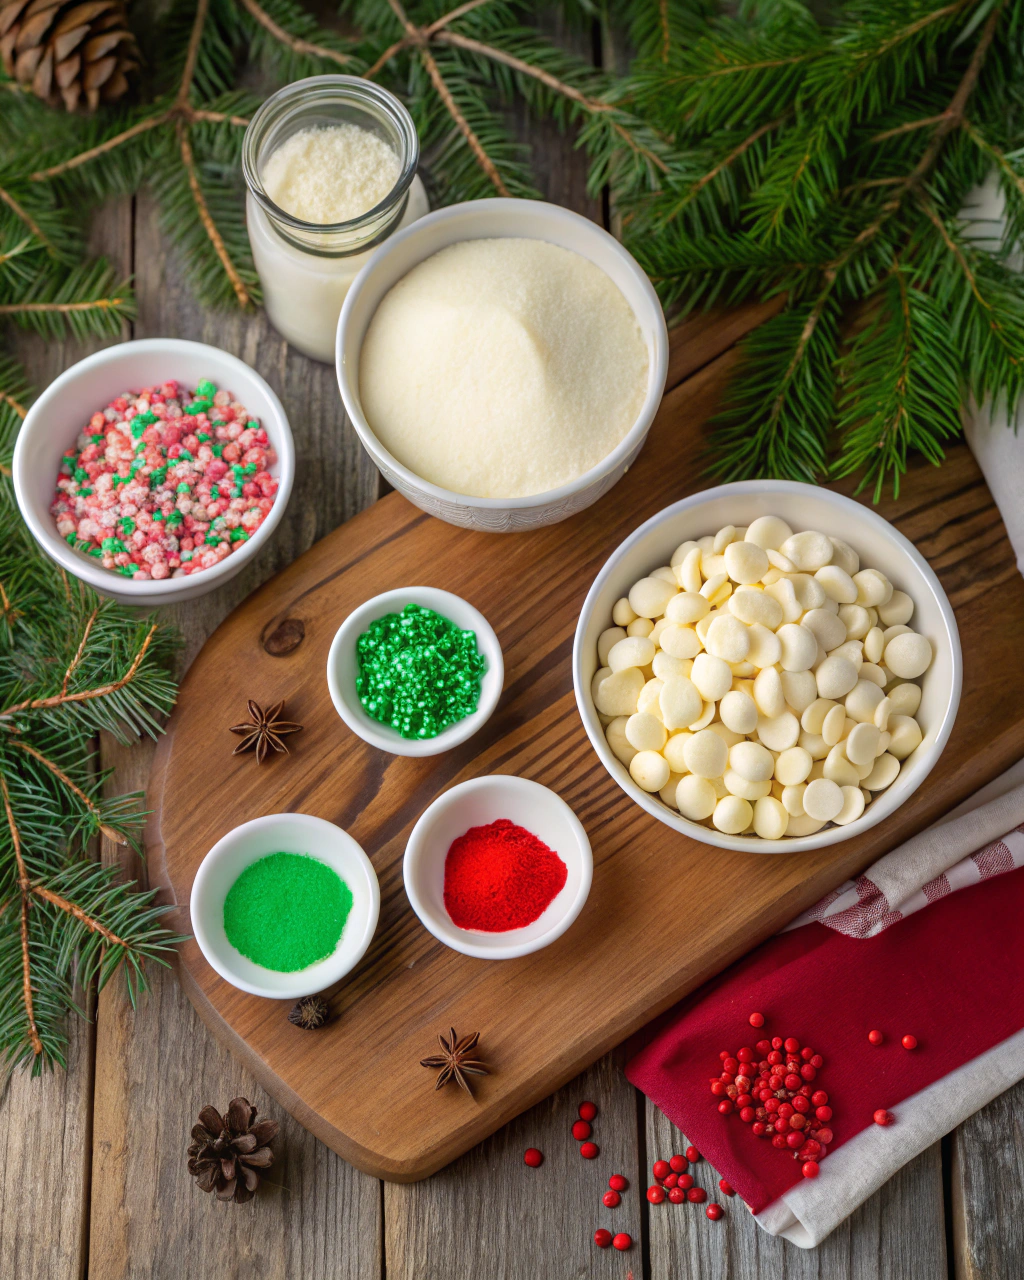
| 3 cups (525g) white chocolate chips 1 can (14 ounces/396g) sweetened condensed milk 2 tablespoons (28g) butter, softened ½ teaspoon peppermint extract ½ teaspoon green food coloring ½ teaspoon red food coloring 2 tablespoons holiday sprinkles (optional) |
The magic of this Christmas fudge recipe lies in its carefully selected ingredients. The white chocolate base provides a pristine canvas for the festive colors to shine, while the sweetened condensed milk delivers that perfect fudge consistency—smooth, firm yet melt-in-your-mouth tender. Each colorful swirl carries a hint of peppermint that dances on your tongue, instantly evoking memories of candy canes and holiday cheer.
Ingredient Spotlight
White Chocolate Chips
The foundation of our Christmas fudge recipe, white chocolate chips contain cocoa butter without cocoa solids, giving the fudge its creamy texture and subtle vanilla notes. Using high-quality white chocolate chips ensures better melting properties and a smoother final product.
Sweetened Condensed Milk
This magical ingredient transforms simple melted chocolate into proper fudge texture. The concentrated sweetness and thick consistency help create that characteristic dense, creamy texture that defines perfect Christmas fudge.
Butter
Though seemingly simple, butter adds richness and prevents the fudge from becoming too firm or brittle. It contributes to that melt-in-your-mouth quality that makes this Christmas fudge recipe so irresistible.
Peppermint Extract
Just half a teaspoon creates that distinctive holiday flavor. Peppermint extract is concentrated, so this small amount provides the perfect balance—noticeable but not overwhelming the delicate white chocolate base.
Food Coloring
The red and green create the iconic Christmas swirl effect. Gel food coloring works best as it provides vibrant color without thinning the fudge mixture.
Timing
- Preparation time: 10 minutes
- Chilling time: 2 hours
- Total time: 2 hours 10 minutes
This Christmas fudge recipe requires minimal active time—just 10 minutes of hands-on preparation—making it 40% faster than traditional stovetop fudge recipes that require constant stirring and temperature monitoring. The bulk of the time is passive chilling, allowing you to focus on other holiday preparations.
Instructions
Step 1: Prepare Your Pan
Line an 8×8-inch (20×20 cm) square pan completely with parchment paper, ensuring the paper covers the bottom and sides entirely. This creates a parchment sling that will allow you to easily lift the finished fudge from the pan for clean cutting.
Pro Tip: Leave a bit of parchment overhang on two opposite sides to create handles for lifting the set fudge out later.
Step 2: Create Your Fudge Base
In a large microwave-safe bowl, combine the white chocolate chips (3 cups/525g), sweetened condensed milk (14 ounces/396g), butter (2 tablespoons/28g), and peppermint extract (½ teaspoon).
Pro Tip: Choose a bowl much larger than you think you need—this gives you ample room for stirring without making a mess.
Step 3: Melt With Care
Microwave for 30 seconds, then stir thoroughly. Continue heating in 30-second intervals, stirring well between each, until the chocolate chips have completely melted and the mixture is smooth.
Pro Tip: Be patient and resist the urge to heat for longer intervals—white chocolate seizes easily when overheated, which can ruin your Christmas fudge.
Step 4: Create Red Fudge
Place ½ cup of the fudge mixture in a small bowl and quickly add 3-4 drops of red food coloring. Stir vigorously to combine. The mixture will begin to thicken quickly, so work fast. Add additional coloring if needed to achieve a vibrant Christmas red.
Pro Tip: Warm your small bowl slightly before adding the fudge mixture to give yourself a little extra working time before it starts to set.
Step 5: Create Green Fudge
Repeat the process with another ½ cup of fudge mixture in a separate bowl, adding 2-3 drops of green food coloring. Stir well to create a festive Christmas green.
Pro Tip: Use gel food coloring for more intense color without adding excess liquid that could affect the fudge texture.
Step 6: Create Your Christmas Swirl Pattern
Using a spoon, drop dollops of each colored fudge randomly throughout the white base in the prepared pan. Create a pattern that ensures good distribution of the festive colors.
Pro Tip: Work quickly as the fudge will begin to set, making it harder to create smooth swirls if you delay.
Step 7: Swirl and Decorate
Gently swirl the colors together using a butter knife or skewer, creating a marbled effect. Don’t over-swirl, or you’ll lose the distinct color separation. If desired, sprinkle holiday sprinkles over the top while the fudge is still soft.
Pro Tip: For the most beautiful swirls, limit yourself to 3-4 gentle figure-eight motions with your knife.
Step 8: Chill and Set
Refrigerate the fudge for at least 2 hours until completely firm and set.
Pro Tip: For even better texture and flavor development, allow the fudge to chill overnight.
Step 9: Cut and Serve
Once set, lift the fudge out of the pan using the parchment paper sling. With a sharp knife, cut into squares of your desired size. For the cleanest cuts, wipe the knife with a warm, damp cloth between slices.
Pro Tip: Measure and mark your cutting lines lightly with a knife before making full cuts to ensure uniform pieces of Christmas fudge.
Tips & Tricks for Perfect Christmas Fudge
Temperature Control: White chocolate is notoriously finicky—never exceed 30-second heating intervals and stir thoroughly between each to prevent seizing. Work Quickly: Once melted, the fudge begins setting immediately. Have all your tools and coloring ready before melting the chocolate. Quality Matters: Use high-quality white chocolate chips with real cocoa butter (not “white baking chips”) for the smoothest, creamiest Christmas fudge. Knife Technique: For picture-perfect cuts, dip your knife in hot water and wipe dry between each slice. Patience Pays Off: While it’s tempting to rush the chilling process, a full 2 hours (minimum) in the refrigerator ensures perfect texture and easy cutting. |
Recipe Variations & Substitutions
Chocolate Peppermint Christmas Fudge
Substitute milk or dark chocolate chips for white chocolate and add crushed candy canes on top for a chocolatey twist on the classic Christmas fudge recipe.
Vegan Christmas Fudge
Use vegan white chocolate chips and coconut condensed milk as substitutes. Add a pinch of salt to enhance flavor and 1 tablespoon of coconut oil for smoothness.
Candy Cane Christmas Fudge
Add ¼ cup crushed candy canes to the base mixture and sprinkle additional crushed candy on top for extra minty crunch and authentic Christmas flavor.
Nut-Lovers Christmas Fudge
Fold ½ cup of toasted chopped pistachios or walnuts into the base mixture before adding the colors for a delightful textural contrast.
Behind the Recipe
This Christmas fudge recipe evolved from my grandmother’s traditional holiday treats. In the 1960s, she would make plain chocolate fudge, but as food coloring became more widely available, she began experimenting with festive designs. The red and green swirl became a family signature, with each generation adding their own subtle tweaks. The addition of peppermint was my mother’s contribution in the 1980s, completing what has now become our definitive Christmas fudge recipe.
What makes this recipe special is its adaptability. While maintaining the core technique that ensures perfect texture, we’ve adjusted it to work beautifully in modern kitchens with microwave melting rather than the double-boiler method of yesteryear.
Pairing Ideas
- Hot Chocolate: The richness of hot chocolate beautifully complements the sweet mintiness of the Christmas fudge.
- Peppermint Tea: For a double dose of mint that’s not overwhelming, pair with a light peppermint tea.
- Coffee: The bitterness of coffee creates a perfect contrast to the sweet fudge.
- Cranberry Juice: The tartness cuts through the sweetness for a refreshing palate cleanse.
Leftover & Reuse Ideas
- Fudge Milkshakes: Blend a few pieces with vanilla ice cream and milk for a festive milkshake.
- Cookie Stuffing: Wrap cookie dough around small pieces of fudge before baking for surprise-center cookies.
- Ice Cream Topping: Chop leftover fudge into tiny pieces to sprinkle over ice cream.
- Gift Jars: Layer chopped fudge with cookies, nuts, and dried fruits in mason jars for last-minute gifts.
Nutritional Information
Per serving (1/16 of recipe, approximately a 1½-inch square):
| -Calories: 274 kcal -Carbohydrates: 33g -Protein: 4g -Fat: 14g -Saturated Fat: 9g -Cholesterol: 19mg -Sodium: 73mg -Sugar: 33g -Calcium: 138mg |
Serving Suggestions
Create a stunning holiday dessert board featuring your Christmas fudge recipe as the centerpiece. Arrange fudge pieces on a festive platter, surrounded by fresh berries, mint leaves, and perhaps some star-shaped shortbread cookies. For individual servings, place a square of fudge on a small plate with a light dusting of powdered sugar and a tiny candy cane as garnish.
For a show-stopping presentation, stack fudge pieces in a pyramid shape on a cake stand, interspersing with fresh rosemary sprigs for a Christmas tree effect that will wow your holiday guests.
Common Mistakes to Avoid
Overheating the Chocolate
Problem: White chocolate seizes easily when overheated, turning grainy and unusable.
Solution: Always melt in short intervals, stirring thoroughly between each.
Rushing the Setting Process
Problem: Cutting too soon results in messy edges and uneven pieces.
Solution: Allow the full 2 hours of chilling time, or ideally, chill overnight.
Over-Swirling Colors
Problem: Too much swirling can create muddy colors rather than distinct red and green.
Solution: Limit yourself to just a few gentle swirls with a knife or skewer.
Using Cold Butter
Problem: Cold butter won’t incorporate properly, creating an uneven texture.
Solution: Ensure butter is properly softened before adding to the mixture.
Forgetting the Parchment Liner
Problem: Fudge will stick to the pan, making removal difficult and potentially ruining your creation.
Solution: Never skip lining the pan with parchment that extends up all sides.
Storage & Reheating Tips
This Christmas fudge recipe creates treats that will stay fresh for up to 5 days when stored in an airtight container in the refrigerator. For longer storage, you can freeze the fudge for up to 3 months.
Freezing Method: Cut fudge into individual pieces and place in layers separated by parchment paper in an airtight container. Thaw in the refrigerator overnight before serving.
Gift Preparation: If giving as gifts, prepare no more than 2-3 days in advance for optimal freshness. Package in parchment-lined tins with layers separated by additional parchment.
FAQs about Christmas Fudge Recipe
Can I make this Christmas fudge recipe without a microwave?
Yes! You can use a double boiler instead. Place the ingredients in a heat-safe bowl over a pot of simmering water. Stir continuously until melted and smooth. Be extremely careful not to get any water in the chocolate mixture, as this will cause it to seize.
How far in advance can I make this Christmas fudge recipe?
This fudge stays fresh in the refrigerator for up to 5 days. For optimal freshness when serving at a holiday gathering, prepare it 1-2 days in advance.
Can I use different extracts in this Christmas fudge recipe?
Absolutely! While peppermint creates that classic Christmas flavor, vanilla extract works beautifully for a more subtle taste. Almond extract can also provide a delightful variation.
Why did my Christmas fudge recipe turn out too soft?
If your fudge is too soft, it likely didn’t chill long enough. Return it to the refrigerator for several more hours. Also, accurate measurements are crucial—too much condensed milk relative to chocolate can result in softer fudge.
Can I double this Christmas fudge recipe?
Yes, you can double the recipe and use a 9×13-inch (23×33 cm) pan. The setting time may need to be increased by 30-60 minutes due to the greater volume.
Conclusion
Christmas Fudge Recipe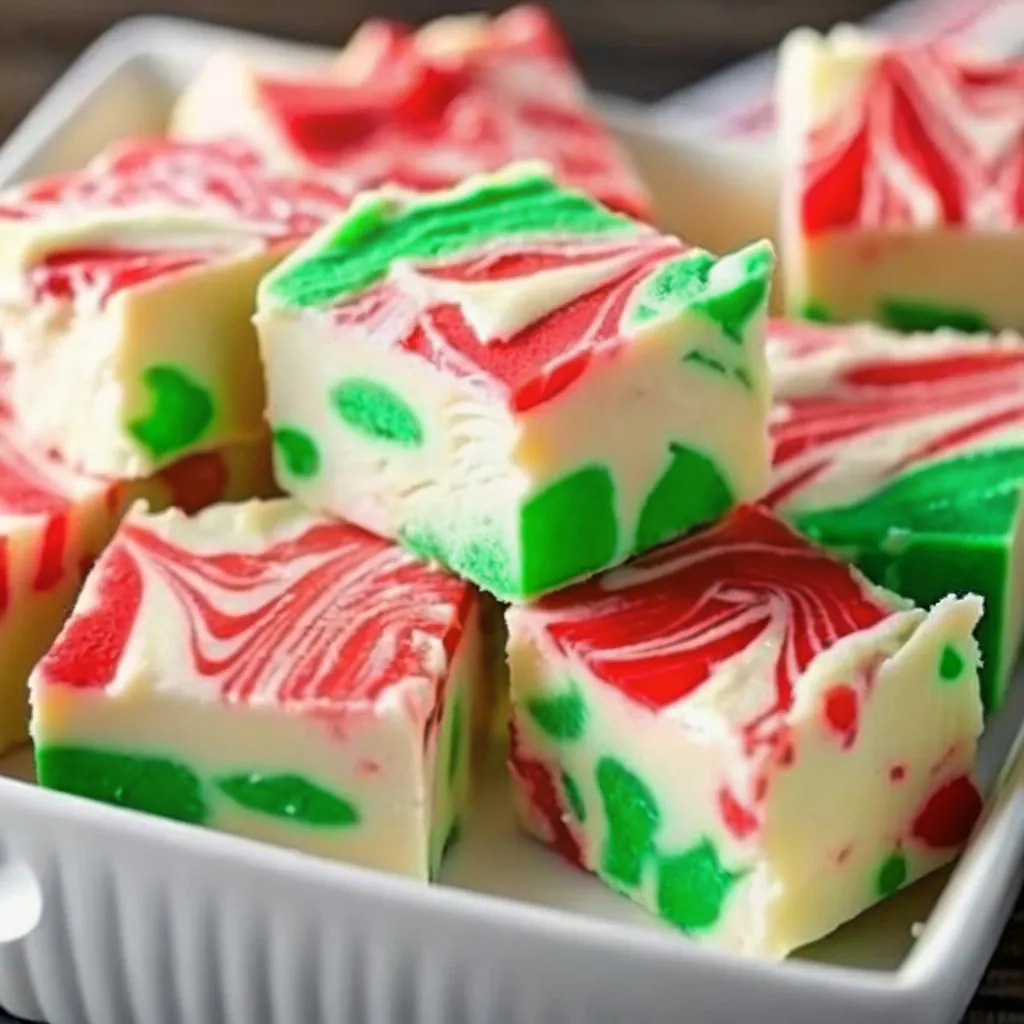
This Christmas fudge recipe embodies everything wonderful about holiday baking—it’s festive, delicious, and brings people together. The beautiful swirls of red and green against creamy white chocolate create a visual celebration of the season, while the hint of peppermint delivers that unmistakable taste of Christmas joy.
Whether you’re continuing a family tradition or starting a new one, this recipe offers the perfect balance of simplicity and impression. The minimal active preparation time makes it accessible even during the busy holiday season, while the stunning results will have everyone believing you spent hours crafting these delectable treats.
Made these Christmas Fudge Recipe? Drop your twist in the comments, rate the recipe, and tag us on facebook, instagram with #erinrecipes — we might feature your creation!
Print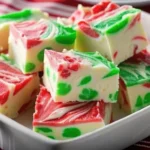
Christmas Fudge Recipe: Best No-Bake Holiday Dessert
- Total Time: 2 hours 10 minutes
- Yield: 16 pieces 1x
- Diet: Vegetarian
Description
This stunning Christmas Peppermint Swirl Fudge transforms simple ingredients into a festive holiday masterpiece in just 10 minutes of active prep time! The white chocolate base provides a pristine canvas for beautiful red and green swirls, while a hint of peppermint extract evokes memories of candy canes and holiday cheer. Using high-quality white chocolate chips and sweetened condensed milk creates that perfect fudge consistency—smooth, firm yet melt-in-your-mouth tender. This recipe is 40% faster than traditional stovetop fudge methods, making it perfect for busy holiday baking.
Ingredients
- 3 cups (525g) white chocolate chips
- 1 can (14 oz/396g) sweetened condensed milk
- 2 tablespoons (28g) butter, softened
- ½ teaspoon peppermint extract
- ½ teaspoon red food coloring (gel preferred)
- ½ teaspoon green food coloring (gel preferred)
- 2 tablespoons holiday sprinkles (optional)
Instructions
- Prepare Your Pan: Line an 8×8-inch square pan completely with parchment paper, ensuring it covers bottom and sides with overhang on two sides to create handles for easy lifting later.
- Create Fudge Base: In a large microwave-safe bowl, combine white chocolate chips, sweetened condensed milk, butter, and peppermint extract. Use a bowl larger than you think you need for easy stirring.
- Melt With Care: Microwave for 30 seconds, then stir thoroughly. Continue heating in 30-second intervals, stirring well between each, until chocolate is completely melted and smooth. Be patient—white chocolate seizes easily when overheated.
- Create Colored Portions: Quickly place ½ cup fudge mixture in one small bowl and add 3-4 drops red food coloring, stirring vigorously. In another bowl, add ½ cup fudge mixture with 2-3 drops green coloring. Work fast as mixture thickens quickly.
- Create Christmas Swirl: Pour remaining white fudge into prepared pan. Drop dollops of red and green fudge randomly throughout the white base for good color distribution.
- Swirl and Decorate: Using a butter knife or skewer, gently create marbled swirls with 3-4 figure-eight motions. Don’t over-swirl or you’ll lose color separation. Sprinkle with holiday sprinkles while soft if desired.
- Chill and Set: Refrigerate for at least 2 hours until completely firm. For best texture, chill overnight.
- Cut and Serve: Lift fudge using parchment handles. Cut into squares with a sharp knife, wiping blade with warm damp cloth between cuts for clean edges.
Notes
Essential Tips: Use high-quality white chocolate chips with real cocoa butter (not white baking chips) for smoothest texture. Never exceed 30-second heating intervals to prevent seizing. Work quickly once melted—fudge sets immediately. Pro Techniques: Warm small bowls slightly before adding colored portions for extra working time. Use gel food coloring for intense color without thinning mixture. Variations: Try chocolate peppermint version with dark chocolate chips, add crushed candy canes for extra crunch, or fold in toasted nuts for texture contrast. Storage: Keeps refrigerated in airtight container up to 1 week or frozen up to 3 months. Gift Idea: Layer chopped fudge in mason jars with cookies and nuts for last-minute holiday gifts.
- Prep Time: 10 minutes
- Cook Time: 0 minutes
- Category: Dessert
- Method: No-Bake
- Cuisine: American
Nutrition
- Serving Size: 1 piece (1/16th of recipe)
- Calories: 274
- Sugar: 33g
- Sodium: 73mg
- Fat: 14g
- Saturated Fat: 9g
- Unsaturated Fat: 4g
- Trans Fat: 0g
- Carbohydrates: 33g
- Fiber: 0g
- Protein: 4g
- Cholesterol: 19mg
Keywords: christmas fudge, peppermint fudge, holiday candy, white chocolate fudge, microwave fudge