
When my teenage daughter first brought home a recipe clipping from her friend’s mom, I had no idea it would become our family’s most requested dessert. This Death by Chocolate Poke Cake literally stopped conversations at our dinner table – the rich, gooey layers of chocolate pudding, fudge sauce, and whipped topping create pure dessert magic. What started as a simple weeknight experiment has transformed into our go-to celebration cake, and I’m thrilled to share every secret that makes this Death by Chocolate Poke Cake absolutely irresistible. You’ll discover how to create perfectly moist cake layers, achieve that signature “poked” texture, and master the art of layering flavors that will have your family begging for seconds.
Why Death by Chocolate Poke Cake Matters
In a world of complicated desserts requiring specialty equipment and professional techniques, this Death by Chocolate Poke Cake stands as a testament to the power of simple, accessible baking. It’s the kind of dessert that transforms ordinary Tuesday nights into special occasions, bringing families together around the kitchen table with genuine excitement. The beauty lies not just in its incredible taste, but in how it makes home baking feel achievable and rewarding for cooks of every skill level.
Behind the Recipe
This recipe holds a special place in my heart because it reminds me of my grandmother’s philosophy: “The best desserts are the ones that bring people together.” I still remember the first time I watched her poke holes in a chocolate cake with the handle of a wooden spoon, explaining how each little cavity would become a pocket of pure indulgence. That simple technique, passed down through generations of home bakers, transforms an ordinary cake mix into something extraordinary. It’s proof that the most memorable desserts often come from the simplest methods.
External Resources
For more inspiration with poke cakes, check out this fantastic Jello Poke Cake recipe with any flavor that shows the versatility of this technique. If you’re passionate about chocolate desserts like I am, you’ll love exploring these favorite dark chocolate desserts for even more decadent ideas. Don’t miss our German Chocolate Poke Cake and our incredible Apple Crisp Cheesecake for more show-stopping desserts your family will adore.
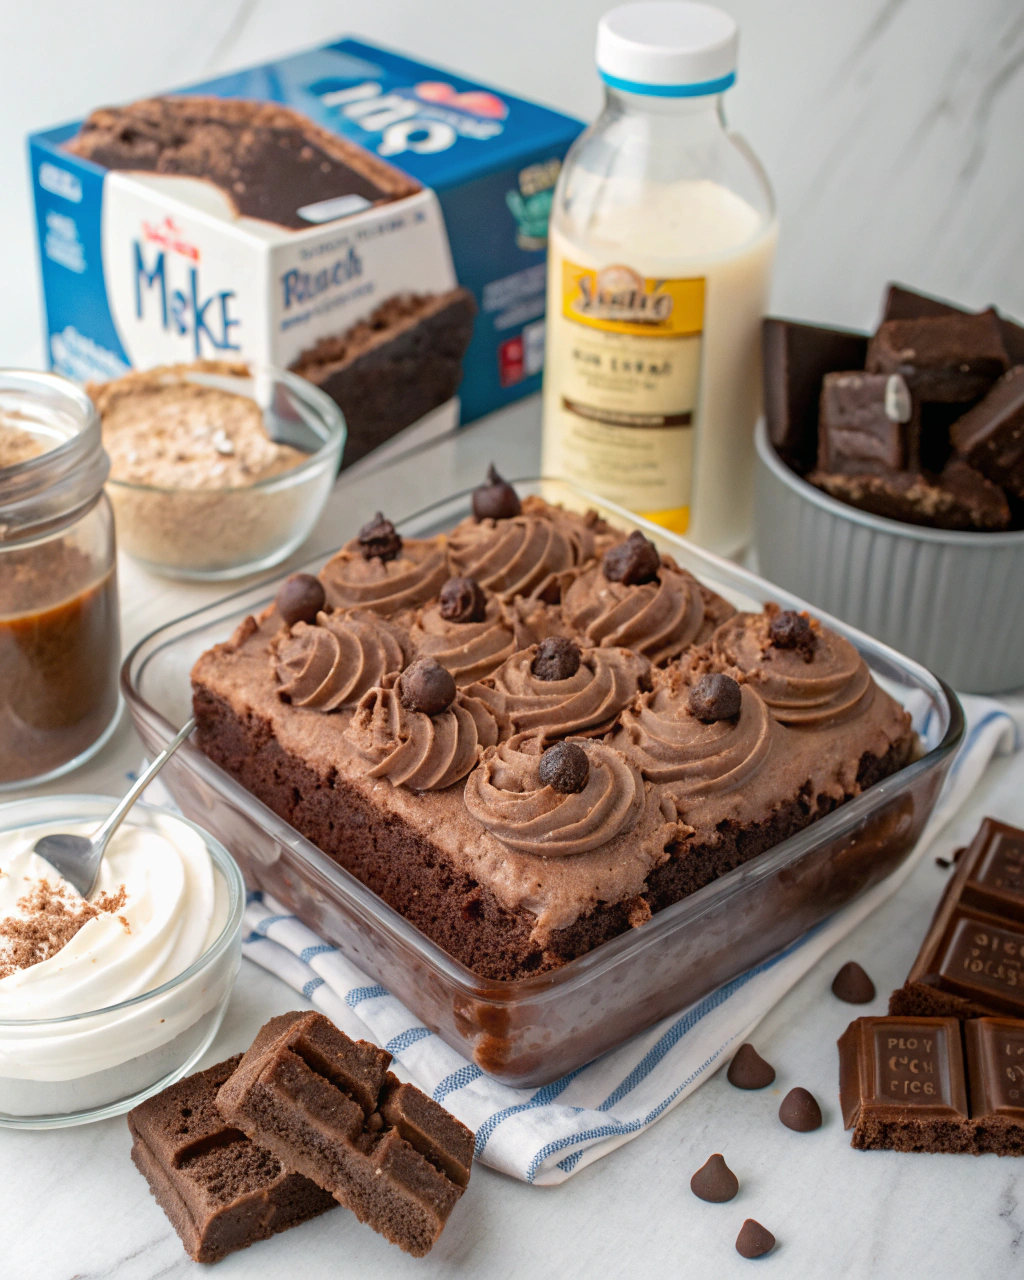
Ingredients
|
Ingredient Spotlight
The dark chocolate cake mix serves as our foundation – while homemade is lovely, a quality boxed mix ensures consistent results every time. The instant chocolate pudding is the star of this show, creating both the filling and the topping layer. Using whole milk instead of skim gives us that luxurious, creamy texture that makes each bite feel indulgent. The sweetened condensed milk combined with hot fudge sauce creates a molten chocolate river that seeps into every poked hole, while the whipped topping provides a light contrast to all that rich chocolate intensity.
Timing
|
Instructions
Step 1: Prepare the Cake Base
Make the chocolate cake according to package directions and bake in a 9×13-inch baking pan. My grandmother always said to tap the pan gently on the counter after pouring in the batter – it releases air bubbles for a more even texture. Let the cake cool completely before moving to the next step; patience here prevents a soggy mess later.
Step 2: Create the First Pudding Layer
In a medium bowl, whisk together one package of instant chocolate pudding with 2 cups of milk until smooth and thick. Work quickly here – instant pudding sets fast, and you want it pourable when it hits those cake holes.
Step 3: Poke and Fill
Using the handle end of a wooden spoon, poke holes all over the cooled cake, spacing them about 1 inch apart. Pour the pudding mixture slowly over the cake, using the back of a spoon to gently encourage filling into each hole. This is where the magic happens – every bite will have pockets of creamy chocolate goodness.
Step 4: Prepare the Fudge Layer
In a microwave-safe bowl, combine the sweetened condensed milk and hot fudge sauce. Microwave for 1 minute, stir well, then continue heating in 30-second intervals until the mixture is smooth and pourable. The warmth helps it flow into those holes beautifully.
Step 5: Add the Fudge Layer
Pour the warm fudge mixture slowly over the cake, again taking care to fill the holes. Use a offset spatula to spread any excess evenly across the surface. Chill the cake until completely cooled – this sets the layers and prevents mixing when you add the topping.
Step 6: Create the Final Topping
In a medium bowl, whisk the second pudding package with the remaining 2 cups of milk until thick. Gently fold in the thawed whipped topping until just combined – overmixing deflates the airiness we want.
Step 7: Finish and Chill
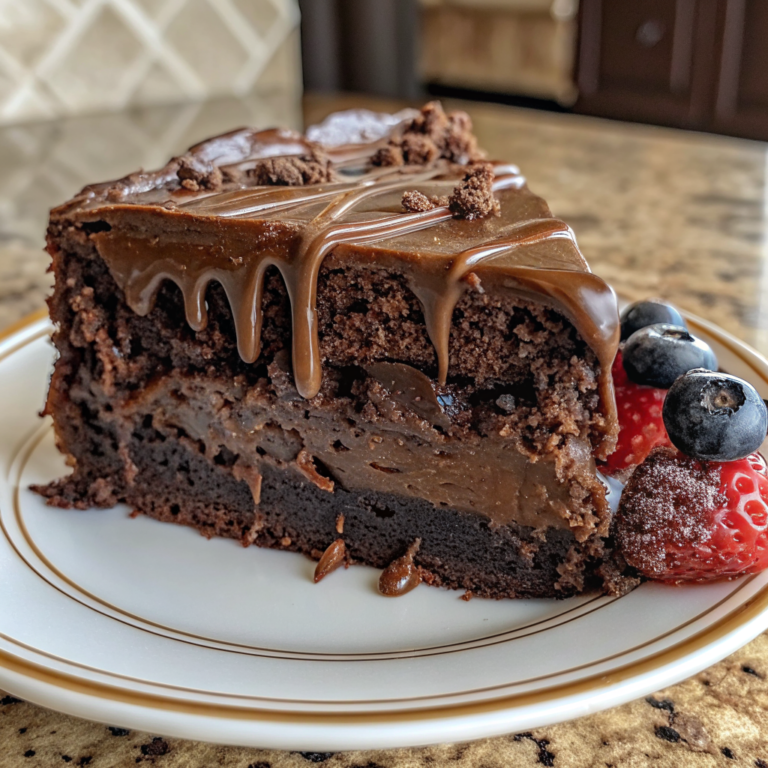
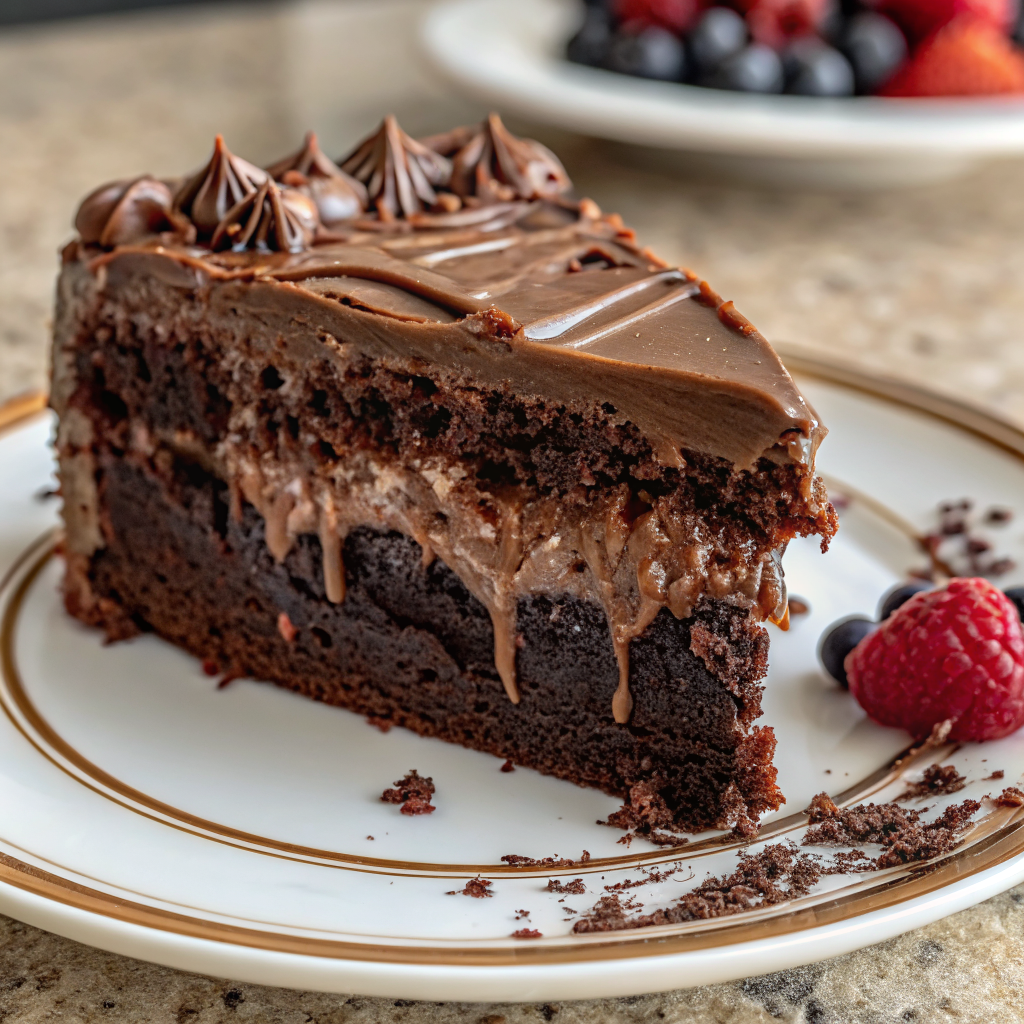
Spread the pudding-whipped topping mixture evenly over the chilled cake and sprinkle with chopped chocolate bars. Chill for at least 4 hours, but overnight is even better for fully set layers and easier slicing.
Tips & Tricks for Perfect Death by Chocolate Poke Cake
|
Recipe Variations & Substitutions
Peanut Butter Chocolate Version: Add 1/2 cup peanut butter to the fudge mixture for a rich, nutty twist that kids absolutely love.
Coffee Lover’s Twist: Replace 1/2 cup of milk with strong cooled coffee in the pudding layers for a sophisticated mocha flavor.
Lighter Version: Use sugar-free pudding mix and light whipped topping to reduce calories without sacrificing the indulgent experience.
Busy Parent Hack: Make this in a disposable aluminum pan for easy transport to potlucks or school events – no worrying about getting your dish back!
Leftover & Reuse Ideas
Transform leftover Death by Chocolate Poke Cake into decadent trifle parfaits by layering cubes in clear glasses with fresh whipped cream and berries. Crumble pieces over vanilla ice cream for an instant sundae upgrade, or blend frozen pieces with milk for an incredible milkshake. The cake actually freezes beautifully for up to 3 months – just thaw overnight in the refrigerator and it tastes fresh-made.
Pairing Ideas
Serve alongside tall glasses of cold milk or rich hot coffee to balance the intense chocolate flavors. Fresh strawberries or raspberries provide a bright, acidic contrast that cuts through the richness beautifully. For special occasions, try pairing with vanilla bean ice cream or a simple fruit salad with mint. Sparkling water with a twist of lemon makes an excellent palate cleanser between rich bites.
Serving Suggestions
Cut into generous squares using a sharp knife dipped in warm water between cuts for clean edges. Serve on chilled dessert plates with a dollop of fresh whipped cream and a sprinkle of cocoa powder for an elegant presentation. For casual family dinners, simply cut and serve directly from the pan – the rustic approach suits this comfort dessert perfectly. Garnish with a few fresh mint leaves for a pop of color that makes even weeknight dessert feel special.
Nutritional Information
Per serving (1/12 of cake): Approximately 520 calories, 18g fat, 85g carbohydrates, 8g protein, 4g fiber. Contains dairy, gluten, and may contain traces of nuts depending on chocolate bar choice. This dessert provides calcium from the milk and dairy components.
Common Mistakes to Avoid
Poking holes while cake is warm: This creates a soggy, collapsed texture instead of defined pockets. Always cool completely first.
Using skim milk: The lack of fat creates thin, watery pudding that doesn’t provide the rich mouthfeel we’re after.
Overmixing the final topping: This deflates the whipped topping, creating a dense rather than light final layer.
Skipping the chilling time: Patience pays off here – proper chilling creates clean slices and fully developed flavors.
Making holes too large: Oversized holes cause structural integrity issues and uneven filling distribution.
Storage & Reheating Tips
Store covered in the refrigerator for up to 5 days – the cake actually improves after the first day as flavors meld together. Cover tightly with plastic wrap directly touching the surface to prevent a skin from forming on the whipped topping. For longer storage, freeze individual portions wrapped in plastic wrap and aluminum foil for up to 3 months. Thaw overnight in the refrigerator; never microwave as it will ruin the texture of the whipped layers.
- Can I make Death by Chocolate Poke Cake ahead of time?
- Absolutely! This Death by Chocolate Poke Cake actually tastes better when made 24 hours ahead, allowing all the flavors to meld beautifully together.
- Is Death by Chocolate Poke Cake suitable for kids?
- Yes! Kids love this Death by Chocolate Poke Cake – the sweet, creamy layers and fun “poked” texture make it a hit at birthday parties and family gatherings.
- Can I use homemade chocolate cake instead of a mix?
- Certainly! Any chocolate cake recipe works, though box mixes ensure consistent results that hold up well to the poking and filling process.
- How do I know when my Death by Chocolate Poke Cake is properly set?
- The Death by Chocolate Poke Cake is ready when the top layer holds its shape when gently touched and slices cleanly without the layers bleeding together.
- What’s the best way to transport Death by Chocolate Poke Cake?
- Keep this Death by Chocolate Poke Cake chilled and transport in the original baking dish with a tight-fitting lid or plastic wrap to maintain the beautiful layers.
FAQs
Conclusion
This Death by Chocolate Poke Cake proves that the most memorable desserts don’t require complicated techniques or expensive ingredients – just quality components combined with love and patience. The simple act of poking holes and layering flavors transforms ordinary ingredients into something truly extraordinary that brings families together around the table. Whether you’re celebrating a special occasion or just want to make Tuesday night feel magical, this recipe delivers pure chocolate bliss that creates lasting memories.
Made these Death by Chocolate Poke Cake? Drop your twist in the comments, rate the recipe, and tag us on facebook, instagram with #erinrecipes — we might feature your creation!

Death by Chocolate Poke Cake – Ultimate Decadent Dessert
Ingredients
Instructions
- Prepare Cake: Make cake according to package directions and bake in a 9x13-inch baking pan.
- Mix Pudding: In a medium bowl, mix 1 box of pudding with 2 cups of milk.
- Poke Holes: Using the end of a wooden spoon, poke holes all over cake.
- Pour Pudding Mixture: Pour pudding mixture slowly over cake, trying to get filling into the holes.
- Prepare Fudge Sauce: In a microwave-safe bowl, combine sweetened condensed milk and hot fudge sauce. Microwave 1 minute, then stir and microwave 30 seconds more. Continue in 30 second intervals until mixture is smooth and pourable.
- Pour Fudge Sauce: Pour slowly over cake, again taking care to fill holes.
- Chill Cake: Chill cake until cooled.
- Prepare Topping: In a medium bowl, whisk together the second pudding mix and remaining milk. Fold in whipped topping.
- Add Topping: Spread mixture evenly over cake and top with chopped chocolate bars.
- Final Chill: Chill at least 4 hours before slicing and serving.