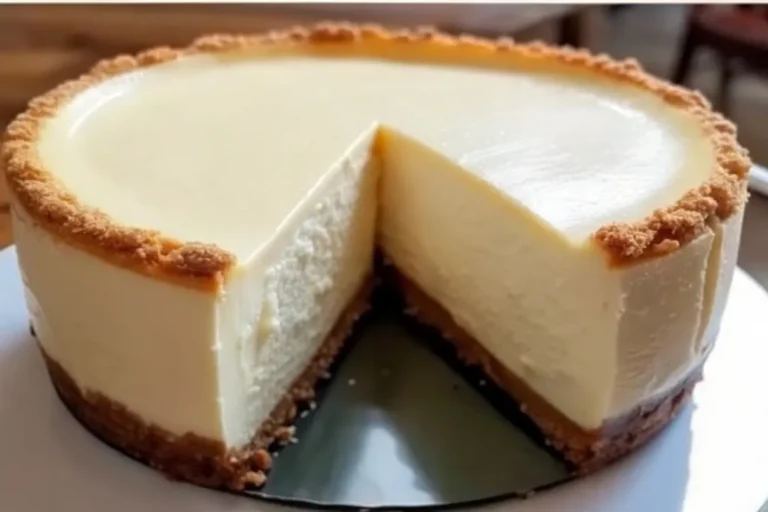
Few desserts evoke as much nostalgia and celebration as a slice of classic New York Cheesecake. I still remember the first time I bit into a velvety, rich cheesecake in a little diner in Manhattan—a moment that transformed an ordinary day into something magical. That memory drives me to perfect my own recipe, one that’s rich, creamy, and simply perfect for any occasion. Today, I’m excited to share my take on the New York Cheesecake that has become my go-to showstopper. From its buttery graham cracker crust to the luxurious, tangy-sweet filling, every bite tells a story of comfort and indulgence.
Ingredients List – With a Personal Twist
Every great cheesecake starts with great ingredients. Here’s a clear, organized list of everything you need—plus, I’ve included some alternatives to suit different tastes:
For the Crust:
- 1 ½ cups graham cracker crumbs
(Tip: If you prefer a slightly different flavor, try using digestive biscuits or even a mix of graham and vanilla wafers.) - ¼ cup sugar
- ⅓ cup melted butter
(For a dairy-free option, use coconut oil for a subtle tropical hint.)
For the Cheesecake Filling:
- 4 (8 oz) packages cream cheese, softened
(Always use full-fat cream cheese for that unbeatable creamy texture.) - 1 ¼ cups granulated sugar
- ½ cup sour cream
(If you want to add a little extra tang, you can substitute with Greek yogurt, but the classic sour cream is best for that signature flavor.) - 2 teaspoons vanilla extract
- 5 large eggs
(Important: Use eggs at room temperature to help the batter combine smoothly without overmixing.)
Interactive Checklist:
☐ 1 ½ cups graham cracker crumbs
☐ ¼ cup sugar
☐ ⅓ cup melted butter
☐ 4 packages (8 oz each) cream cheese, softened
☐ 1 ¼ cups granulated sugar
☐ ½ cup sour cream
☐ 2 teaspoons vanilla extract
☐ 5 large eggs (room temperature)
Timing – Perfect for Busy Lives and Celebrations
This cheesecake is surprisingly quick to put together and bakes into perfection:
- Prep Time: 20 minutes
- Bake Time: 75–90 minutes
- Total Time: Approximately 60 minutes of active work plus cooling/chilling time (refrigerate for at least 4 hours, preferably overnight)
Imagine coming home after a long day and having a luscious dessert ready in just an hour of work (not counting the chill time)! It’s the ideal treat to prepare ahead for a family gathering or a special celebration.
Step-by-Step Instructions – Your Friendly Kitchen Guide
I’ve broken down the process into easy-to-follow steps. Grab your apron, and let’s get baking!
Step 1: Preheat & Prep the Crust
- Preheat your oven to 325°F (165°C).
- Grease a 9-inch springform pan lightly with butter.
- Combine the graham cracker crumbs, ¼ cup sugar, and melted butter in a bowl.
- Press the mixture firmly into the bottom of the pan to form an even, compact crust.
- Bake for 10 minutes. Remove from the oven and set aside to cool completely.
Pro Tip: Pre-baking the crust not only helps it set firmly but also infuses a wonderful buttery crunch into every bite.
Step 2: Prepare the Cheesecake Filling
- In a large mixing bowl, beat the softened cream cheese and 1 ¼ cups granulated sugar with an electric mixer until smooth and fluffy.
- Add the sour cream and vanilla extract, mixing until fully combined.
- Beat in the eggs one at a time on low speed—this is key! Avoid overmixing to prevent air bubbles, which can cause cracks.
Kitchen Hack: Working on low speed minimizes air incorporation, ensuring your cheesecake stays luxuriously dense and creamy.
Step 3: Assemble & Bake
- Pour the cheesecake filling over the cooled crust, smoothing the top with a spatula.
- Place the springform pan on a baking sheet (this catches any drips) and then slide it into your preheated oven.
- Bake for 75 to 90 minutes, or until the edges are set and the center still shows a slight jiggle when you gently shake the pan.
Remember: The center’s gentle wobble is a sign of creamy perfection—it will firm up as it cools!
Step 4: Cool & Chill
- Turn off the oven, crack the door slightly, and let the cheesecake cool inside for 1 hour. This slow cooling process prevents sudden temperature changes that might cause cracks.
- Transfer the cheesecake to the refrigerator and chill for at least 4 hours, preferably overnight, to allow the flavors to meld and the texture to set beautifully.
Step 5: Serve & Enjoy
- Remove the cheesecake from the springform pan, slice it with a hot knife (dip in warm water and wipe dry for clean cuts), and serve plain or with your favorite toppings such as fresh berries, caramel sauce, or whipped cream.
Personal Note: Every time I slice into this cheesecake, I’m reminded of that unforgettable first taste in Manhattan—rich, tangy, and utterly indulgent. It’s a recipe that always brings people together.
Nutritional Information – What’s in a Slice?
Below is an approximate nutritional breakdown per serving (assuming 12 slices):
| Nutrient | Amount per Serving |
|---|---|
| Calories | 420 kcal |
| Total Fat | 28 g |
| Saturated Fat | 16 g |
| Cholesterol | 180 mg |
| Sodium | 450 mg |
| Total Carbohydrates | 30 g |
| Dietary Fiber | 1.5 g |
| Sugars | 22 g |
| Protein | 8 g |
Note: These values are approximate and may vary based on the specific brands of ingredients used.
Healthier Alternatives for the Recipe
For those who want a lighter version without sacrificing flavor:
- Swap Sour Cream: Use low-fat Greek yogurt instead of sour cream for a tangy twist.
- Reduce Sugar: Cut the granulated sugar by 25% and add a natural sweetener like maple syrup to taste.
- Dairy-Free Options: Substitute cream cheese with a high-quality dairy-free cream cheese and use coconut cream in place of sour cream.
- Egg Alternatives: For an eggless version, try a flax egg (1 tablespoon ground flaxseed mixed with 3 tablespoons water per egg) but note this may slightly alter the texture.
Personal Insight: I once experimented with a dairy-free version for a friend with dietary restrictions. Although the flavor was subtly different, the cheesecake still maintained its creamy, dreamy essence.
Serving Suggestions – Get Creative!
This New York Cheesecake is versatile. Here are some ideas to make each slice even more memorable:
- Fresh Berries: Top with a medley of fresh blueberries, raspberries, or strawberries.
- Fruit Sauces: Drizzle with homemade caramel, raspberry, or chocolate sauce.
- Whipped Cream: A dollop of freshly whipped cream adds an extra layer of indulgence.
- Citrus Zest: Sprinkle a little lemon or orange zest on top for a bright, refreshing finish.
My Favorite: I love serving mine with a light raspberry sauce that cuts through the richness of the cheesecake—a perfect balance of sweet and tangy!
Common Mistakes to Avoid
Even seasoned bakers sometimes face pitfalls. Here are some common mistakes and how to avoid them:
- Overmixing the Batter: Too much air in the batter can lead to cracks. Mix on low speed and beat just until combined.
- Using Cold Ingredients: Make sure cream cheese, sour cream, and eggs are at room temperature to ensure a smooth, lump-free batter.
- Underbaking/Overbaking: Rely on the “jiggle test” rather than the color. The center should be slightly wobbly.
- Rushing the Cooling Process: Letting the cheesecake cool gradually in the oven and then thoroughly in the fridge is crucial for a smooth, creamy texture.
Storing Tips – Keep It Fresh
To maintain the perfect texture and flavor:
- Refrigeration: Store the cheesecake in an airtight container in the fridge for up to 4 days.
- Freezing: For longer storage, wrap individual slices tightly in plastic wrap and then in foil. Freeze for up to 2 months. Thaw overnight in the refrigerator before serving.
- Serving: Always bring the cheesecake to room temperature (about 20 minutes out of the fridge) before serving to enhance its creamy texture.
Pro Chef’s Tips – Insider Secrets for Perfection
Here are a few professional tips that have helped me master this cheesecake:
- Room Temperature Ingredients: Always allow your dairy products and eggs to come to room temperature. This reduces mixing time and minimizes air incorporation.
- Hot Knife Technique: For clean slices, dip your knife in hot water before each cut.
- Baking Sheet Backup: Place your springform pan on a baking sheet to catch any drips—it makes cleanup a breeze.
- Practice Patience: Cheesecake is a dessert that rewards patience. Allow it to cool and set slowly for the best texture.
- Experiment with Toppings: Try seasonal fruit compotes or even a drizzle of espresso sauce for a modern twist.
Conclusion – Share the Cheesecake Love
This New York Cheesecake recipe isn’t just about a dessert—it’s about creating memories. Whether you’re serving it at a family dinner, a holiday party, or simply treating yourself, every slice is a reminder that sometimes the simplest recipes make the most lasting impressions. I’d love to hear your stories and see your creations! Leave a comment, share your photos on social media using the hashtag #erinrecipes, and subscribe for more delicious recipes.
FAQs
Q1: Can I prepare this cheesecake ahead of time?
A1: Absolutely! In fact, the flavor deepens when refrigerated overnight. Prepare it a day in advance and let it chill for at least 4 hours (preferably overnight).
Q2: How do I prevent cracks on the top?
A2: Mix the batter on low speed to avoid air bubbles, use room temperature ingredients, and let the cheesecake cool slowly in the oven with the door slightly open.
Q3: What can I serve with this cheesecake?
A3: It pairs wonderfully with fresh berries, fruit sauces, or even a drizzle of caramel. You can also dust it with powdered sugar for a classic look.
Q4: Can I substitute sour cream with Greek yogurt?
A4: Yes, full-fat Greek yogurt works well and adds a subtle tang, though it may slightly alter the texture.
Q5: How do I get smooth slices?
A5: Use a hot knife—dip it in warm water, wipe it dry, and slice. Wipe the knife clean between cuts for neat, perfect slices.

