
Introduction to Old Fashioned Peanut Butter Bars
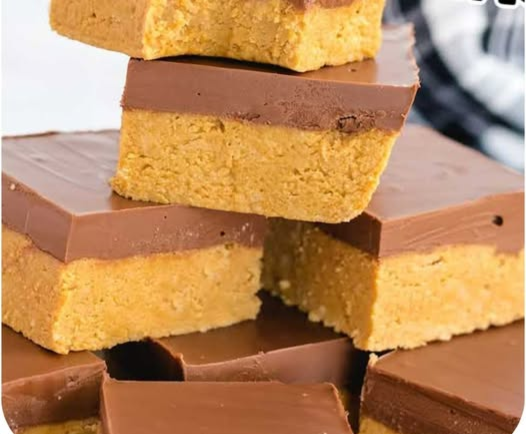
There’s something incredibly comforting about the combination of creamy peanut butter and rich chocolate. Growing up, my mom would whip up a batch of these Old Fashioned Peanut Butter Bars , and the entire house would smell like pure happiness. Fast forward to today, and they remain one of my go-to recipes for nostalgia and indulgence.
If you’ve ever wondered how to recreate that classic flavor profile in a simple yet irresistible dessert, look no further. These bars are not only easy to make but also versatile enough to suit any occasion—whether it’s a cozy family night or a themed party straight out of the Lunch Lady series.
So, are you ready to step back in time and indulge in a treat that’s as timeless as it is delicious? Let’s dive into this Old Fashioned Peanut Butter Bars recipe together!
The Importance of Old Fashioned Peanut Butter Bars
In our fast-paced world, where trends come and go, there’s something grounding about revisiting the classics. These bars remind us of simpler times when desserts didn’t need exotic ingredients or complicated techniques to satisfy our cravings.
What makes Old Fashioned Peanut Butter Bars stand out is their versatility. You can dress them up with fancy garnishes or keep them humble and rustic—it’s entirely up to you. Plus, they’re perfect for all skill levels, from novice bakers to seasoned pros. Whether you’re whipping these up for a quick snack or impressing guests at your next gathering, they’re guaranteed to hit the spot.
Ingredients and Tools You’ll Need
Let’s gather everything we need to create this decadent treat.
Ingredients:
- ¾ cup unsalted butter, melted
- 2 cups powdered sugar
- 2 cups graham crackers, crushed (use a food processor or rolling pin)
- 1¼ cups creamy peanut butter (plus 3 tablespoons for the topping)
- 2½ cups semi-sweet chocolate chips
Tools Required:
- Mixing bowls
- Measuring cups and spoons
- Whisk or electric mixer
- Baking dish (8×8 inches or 9×9 inches)
- Parchment paper or aluminum foil
- Spatula
Pro Tip: Opt for high-quality ingredients like European-style butter and premium chocolate chips for an elevated taste experience.
Step-by-Step Instructions
Preparing the Base
- Mix the Ingredients: In a large mixing bowl, combine the melted butter, powdered sugar, crushed graham crackers, and 1¼ cups of creamy peanut butter. Stir until the mixture resembles a sticky dough.
Fun Fact: Crushing graham crackers by hand is oddly therapeutic—give it a try if you’re feeling stressed! - Press into Dish: Line your baking dish with parchment paper or foil for easy removal later. Press the peanut butter mixture firmly into the bottom of the dish using the back of a spoon or your hands.
Preparing the Chocolate Layer
- Melt the Chocolate: Place the semi-sweet chocolate chips in a microwave-safe bowl. Heat in 30-second intervals, stirring after each interval, until smooth and glossy.
- Add Peanut Butter: Stir in the remaining 3 tablespoons of creamy peanut butter until fully incorporated. This adds a subtle nutty undertone to the chocolate layer.
Assembling the Bars
- Pour the Chocolate: Pour the melted chocolate evenly over the peanut butter base. Use a spatula to spread it smoothly across the surface.
- Refrigerate: Cover the dish with plastic wrap and chill in the refrigerator for at least 2 hours, or until the chocolate layer sets.
Cutting and Serving
- Remove from Dish: Once set, lift the parchment paper or foil to remove the bars from the dish.
- Cut into Bars: Slice into squares or rectangles using a sharp knife. For clean cuts, dip the knife in hot water and wipe dry between slices.
- Serve: Enjoy chilled for maximum flavor—or let them sit at room temperature for a softer texture.
Tips for Perfect Old Fashioned Peanut Butter Bars
- Choose Quality Ingredients: High-quality butter and chocolate make a noticeable difference in taste.
- Experiment with Add-ins: Toss in chopped peanuts, pretzels, or even mini marshmallows for added crunch and texture.
- Enhance with Spices: A pinch of cinnamon or sea salt sprinkled on top elevates the flavors beautifully.
- Customize Sweetness: Adjust the powdered sugar based on your preference—if you prefer less sweetness, reduce it slightly.
Storage and Reheating Tips
To store: Keep the bars in an airtight container in the refrigerator for up to 1 week. For longer storage, freeze them for up to 3 months.
To serve: Let frozen bars thaw in the fridge overnight before slicing. If serving chilled bars, allow them to sit at room temperature for 15-20 minutes for a softer bite.
Conclusion
These Old Fashioned Peanut Butter Bars are more than just a dessert—they’re a love letter to comfort food. With their creamy peanut butter base and luscious chocolate topping, they’re sure to become a staple in your kitchen.
Why not give this recipe a try this weekend? Share your creations with me in the comments below or tag me on social media using #erinrecipes. And don’t forget to subscribe for more nostalgic recipes that bring joy to your table. Happy baking!
FAQs
Q: Can I use chunky peanut butter instead of creamy?
A: While creamy peanut butter works best, chunky peanut butter can be used if you prefer a textured base.
Q: How do I crush graham crackers without a food processor?
A: Place the crackers in a zip-top bag and crush them with a rolling pin or heavy skillet.
Q: Can I freeze these bars?
A: Absolutely! Wrap individual bars in plastic wrap and store them in a freezer-safe container for up to 3 months.