
Transform ordinary pumpkins into masterpieces that make your home the talk of the neighborhood with these genius pumpkin carving ideas. Most pumpkin carving attempts result in basic, uninspiring designs that lack creativity and wow-factor, leaving your Halloween display looking ordinary rather than extraordinary. With the right techniques and progressive skill-building approach, you can master 10 incredible pumpkin carving ideas that range from beginner-friendly to show-stopping advanced designs that will truly amaze your neighbors and create memorable Halloween magic.
Table of Contents
Essential Tools and Safety Guidelines for Genius Pumpkin Carving
Creating stunning carved pumpkins starts with having the right tools and establishing safe practices for the entire family. Professional carvers rely on specific equipment that makes intricate designs achievable while maintaining safety throughout the creative process.
Professional Carving Tool Selection
Invest in a quality pumpkin carving kit that includes fine-tipped saws, various sized scoops, and precision knives designed specifically for pumpkin work. Look for tools with comfortable, non-slip handles and replaceable blades. Essential tools include a large serrated knife for initial cuts, small detail saws for intricate work, and clay sculpting tools for fine details. A quality kit typically costs between $15-30 but will last for years and dramatically improve your results compared to kitchen knives.
Family-Safe Carving Practices
Safety should always be your top priority when implementing creative pumpkin carving ideas. Learn pumpkin carving safety guidelines from hand surgery specialists who treat carving injuries each Halloween season. Always cut away from your body, maintain a clean workspace with good lighting, and never rush through cuts. For families with children, discover pediatric-approved pumpkin carving techniques that allow young ones to participate safely.
Workspace Preparation and Lighting
Set up your carving area with adequate lighting, newspapers or plastic sheeting for easy cleanup, and all tools within easy reach. Good lighting prevents eye strain and reduces the risk of accidents. Keep a first aid kit nearby and ensure all participants understand basic safety rules before beginning. Get professional Halloween decorating safety tips to ensure your creative session remains injury-free and enjoyable for everyone involved.
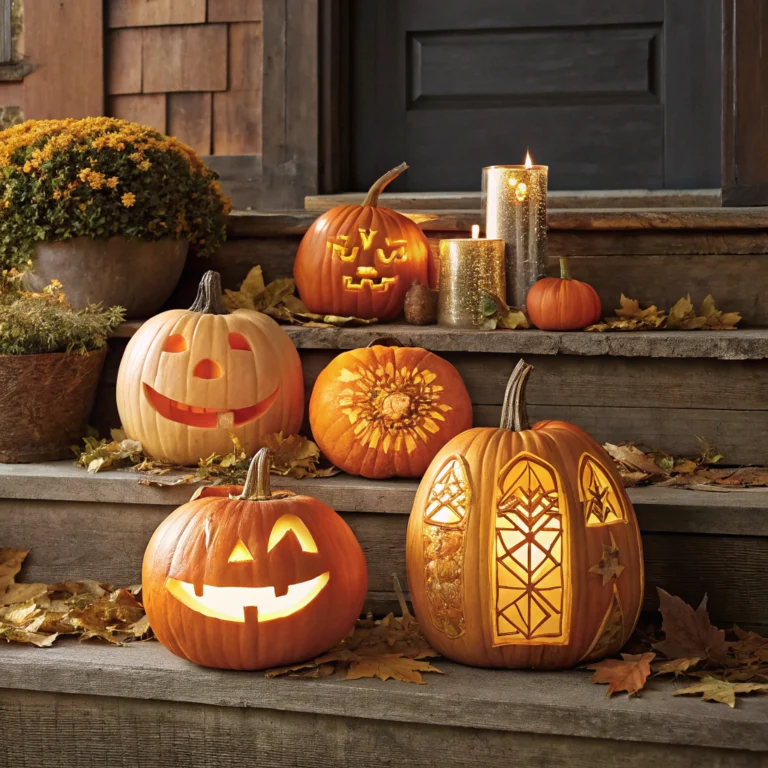
Beginner-Friendly Genius Pumpkin Carving Ideas (3 Designs)
Starting your pumpkin carving journey with these accessible yet impressive designs builds confidence while creating beautiful results. Each design can be completed in 30-45 minutes and requires only basic carving tools.
Geometric Constellation Patterns

Create stunning celestial displays by carving simple geometric shapes that represent star constellations. Start by sketching dots on your pumpkin to represent major stars in recognizable patterns like the Big Dipper or Orion’s Belt. Use a small drill bit or awl to create perfectly round holes of varying sizes. The key is varying the hole sizes to create depth and visual interest. Larger holes represent brighter stars, while smaller ones add subtle detail. This design works beautifully when illuminated from within, creating a magical starry night effect that impresses neighbors while remaining achievable for beginners.
Elegant Silhouette Designs
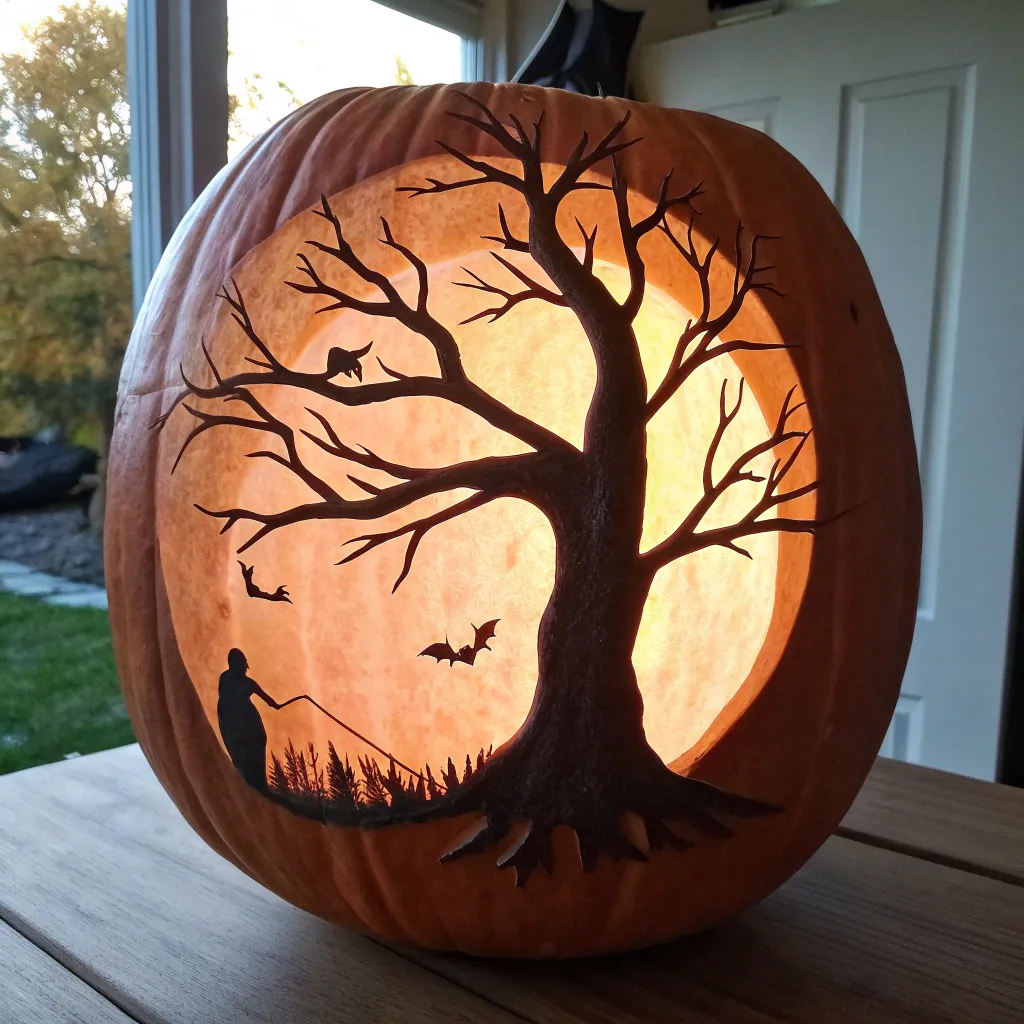
Silhouette carving focuses on creating dramatic contrast between light and shadow. Choose simple, recognizable shapes like a bare tree, city skyline, or mountain range. The beauty lies in the clean lines and dramatic impact when lit. Sketch your design first, keeping details minimal and focusing on strong, recognizable shapes. These pumpkin carving ideas work exceptionally well because they forgive small imperfections while creating sophisticated results that look professionally crafted.
Modern Minimalist Faces
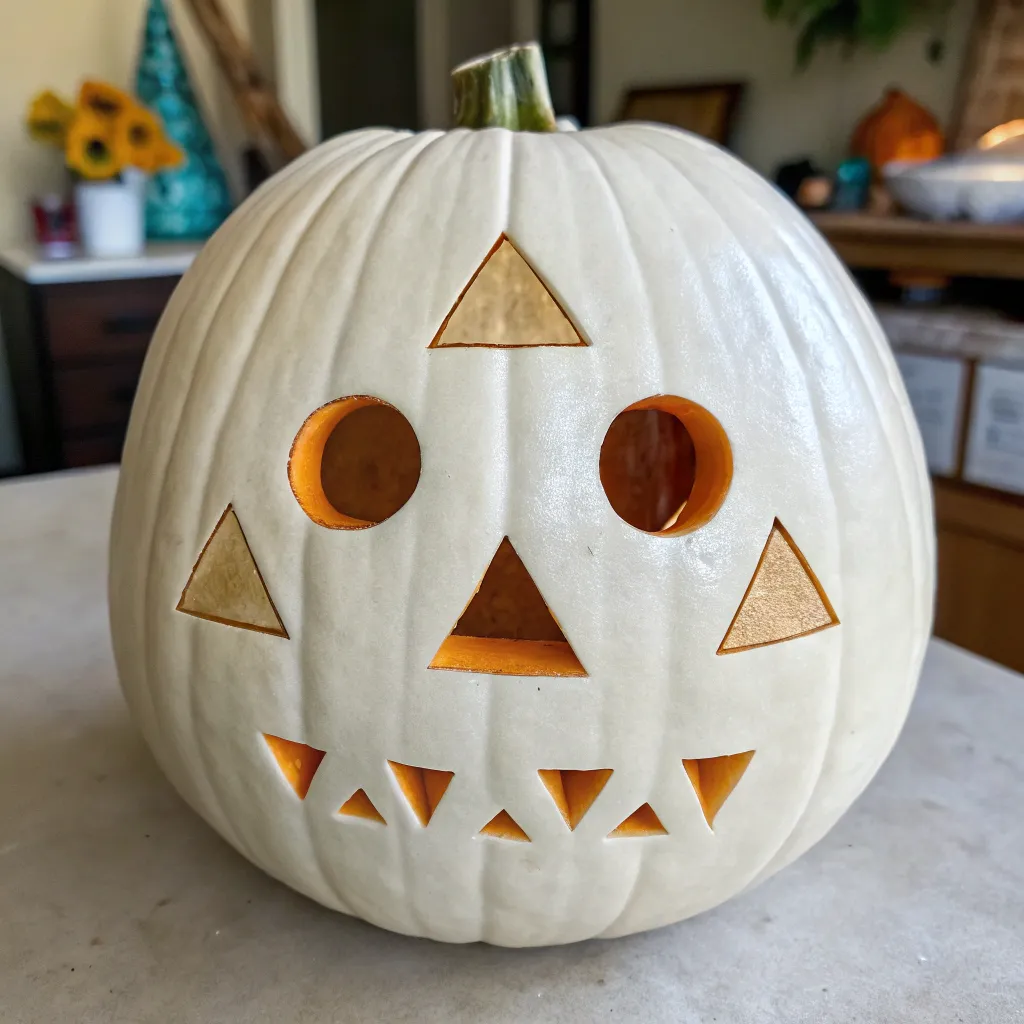
Move beyond traditional jack-o’-lantern faces with contemporary minimalist expressions. Think simple geometric eyes (triangles, circles, or squares) paired with unexpected mouth shapes like gentle smiles or surprised expressions. The key is restraint—use negative space effectively and let each element have room to breathe. These designs prove that simple can be genius when executed with intention and precision.
Intermediate Creative Pumpkin Carving Masterpieces (4 Designs)
Once you’ve mastered basic techniques, these intermediate pumpkin carving ideas introduce layered carving methods and more complex patterns that create impressive visual depth and artistic appeal.
Layered Depth Carving Technique
This technique involves carving different depths into the pumpkin flesh to create a three-dimensional effect. Instead of cutting completely through, you carve away varying amounts of flesh to create layers. Start with your design sketched on the surface, then identify areas for full cuts, partial cuts, and surface scraping. The varying depths create different intensities of light when illuminated, producing a stunning gradient effect. Common mistakes include cutting too deep initially—always start shallow and gradually deepen specific areas as needed.
Nature-Inspired Botanical Patterns
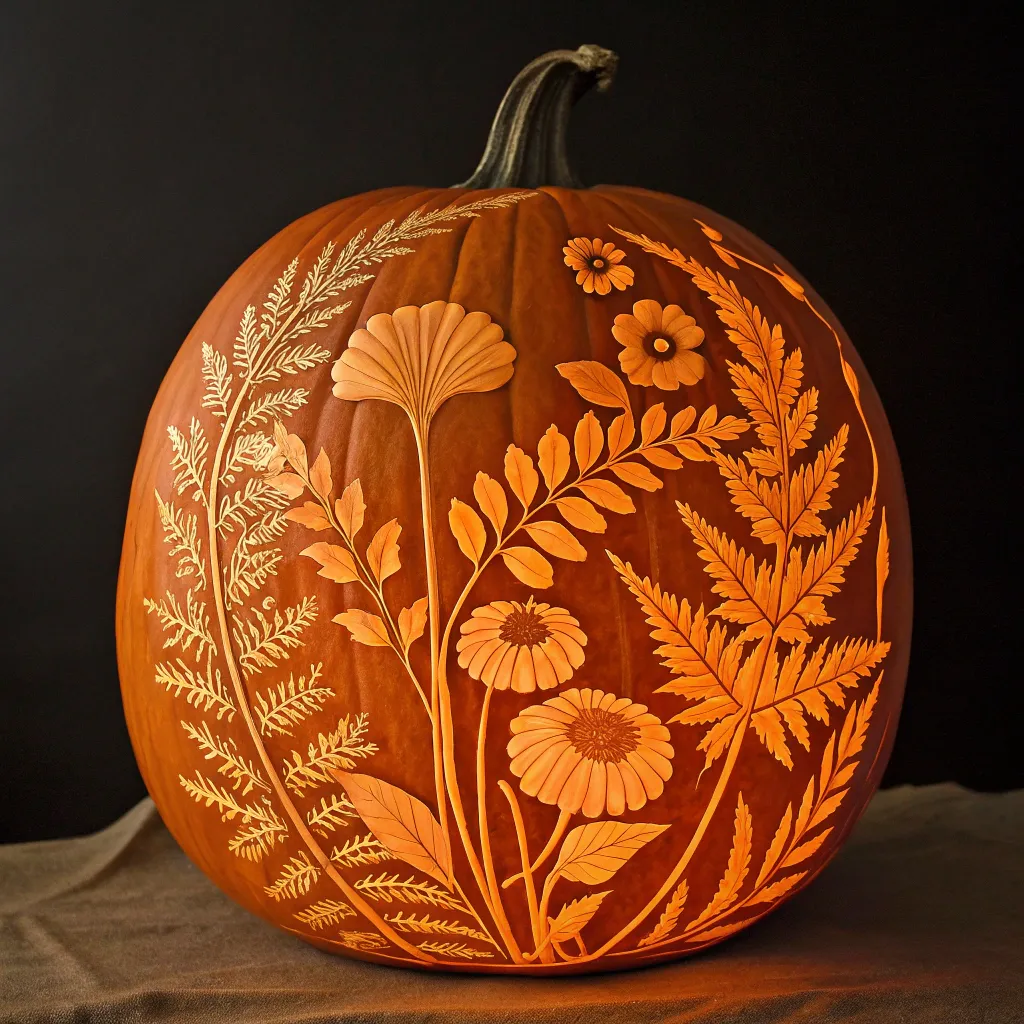
Draw inspiration from leaves, flowers, and natural patterns to create organic, flowing designs. Consider intricate fern fronds, oak leaf patterns, or delicate flower motifs. These designs require patience and attention to detail but create breathtakingly beautiful results. Use thin carving tools for delicate lines and work slowly to maintain the organic flow of natural shapes. The key is observing real botanical elements and translating their essential characteristics into carvable patterns.
Architectural Landmark Silhouettes

Challenge yourself by carving recognizable architectural landmarks like church spires, bridge outlines, or famous building silhouettes. These pumpkin carving ideas require careful planning and precise execution but create conversation-starting pieces. Start with simpler landmarks that have distinctive, recognizable profiles. The Eiffel Tower, London Bridge, or local landmark buildings work well. Focus on capturing the essential elements that make each structure immediately identifiable.
Abstract Artistic Expressions
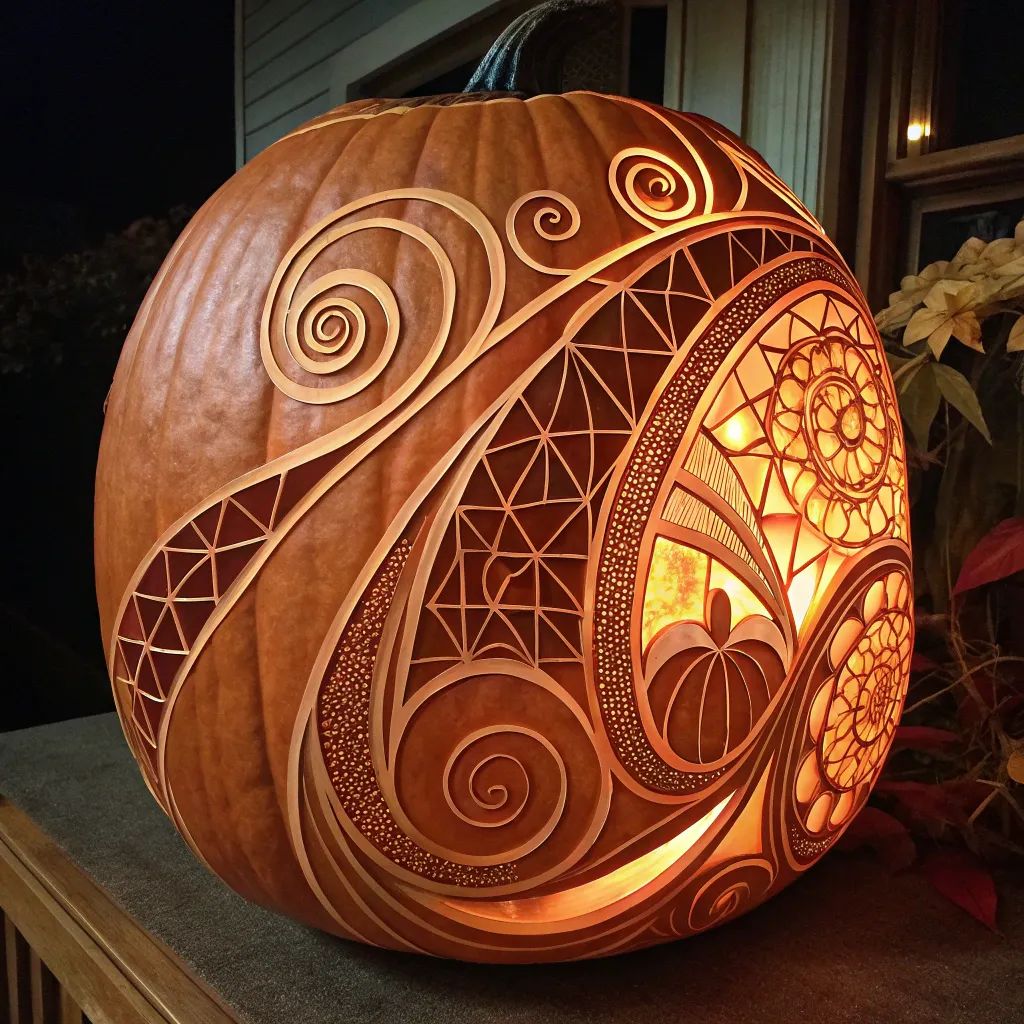
Explore your artistic side with flowing, abstract patterns that emphasize movement and emotion rather than literal representation. Think swirling patterns, interconnected geometric shapes, or flowing ribbon-like designs. These pieces allow for more creative freedom while teaching advanced carving techniques like continuous flowing lines and complex interconnected patterns.
Advanced Show-Stopping Pumpkin Carving Ideas (3 Designs)
These sophisticated techniques represent the pinnacle of pumpkin artistry, requiring patience, skill, and attention to detail that separates amateur efforts from truly impressive masterpieces.
Multi-Layer 3D Carving Effects
Advanced 3D carving involves creating multiple depth layers that interact with light in complex ways. This technique requires understanding how light travels through different flesh thicknesses and planning your design accordingly. Start by mapping out at least four different depth levels: full cuts, deep scrapes (leaving 1/4 inch flesh), medium scrapes (1/2 inch flesh), and surface details. Professional carvers often use this technique to create incredibly realistic scenes with foreground, middle ground, and background elements that appear to have genuine depth and dimension.
Intricate Mandala and Geometric Patterns
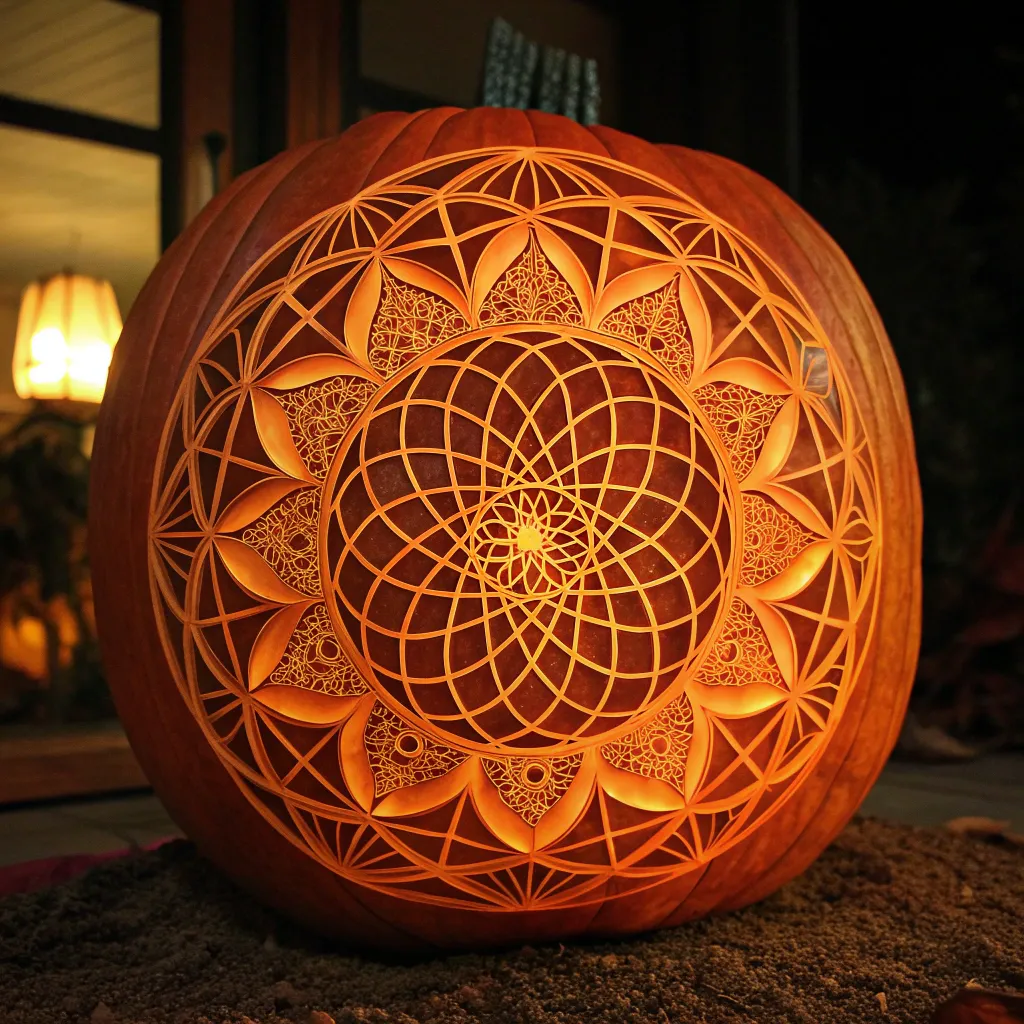
Mandala patterns require precise measurement and symmetrical execution but create mesmerizing results. Begin with a center point and work outward in concentric circles, maintaining perfect symmetry throughout. Use compass and ruler for initial layout, then transfer to the pumpkin surface. These complex pumpkin carving ideas often take 2-3 hours to complete but produce stunning, meditation-inspiring pieces that showcase true artistry and patience.
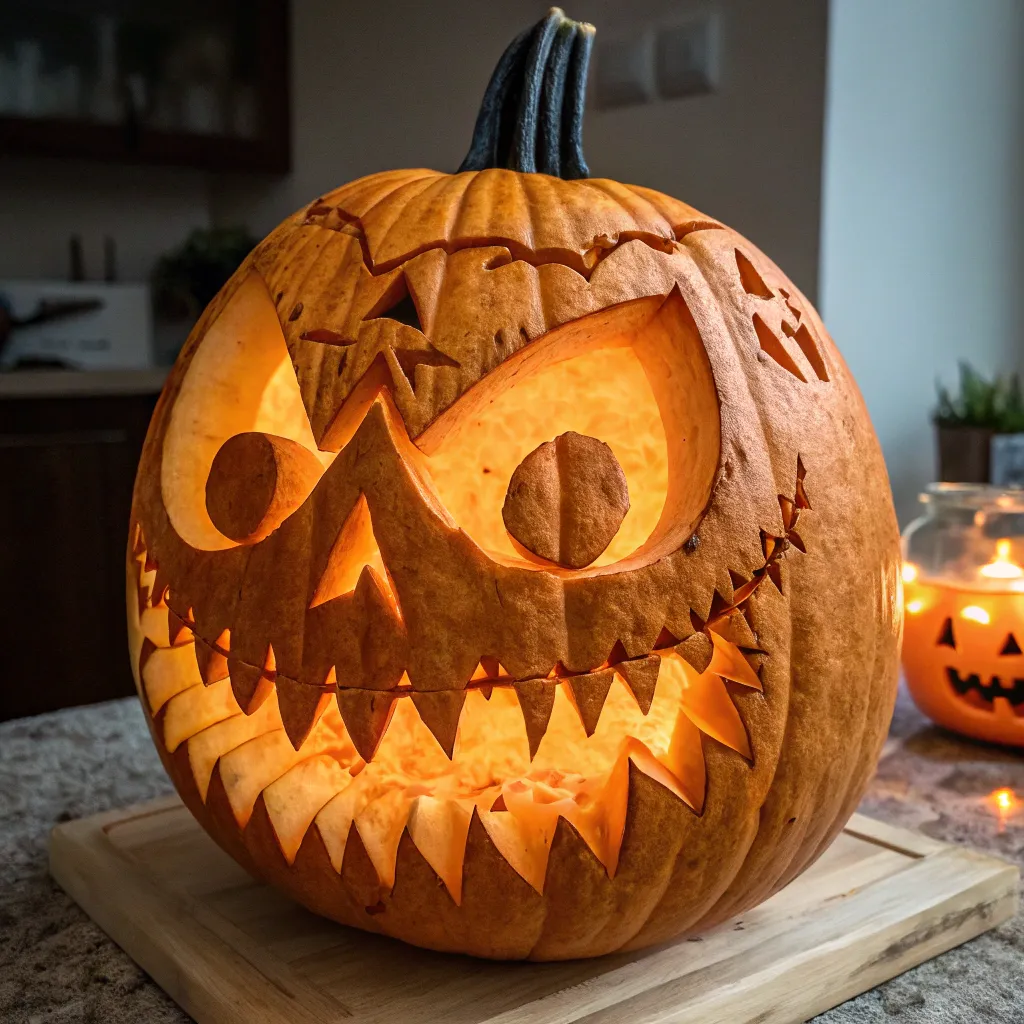
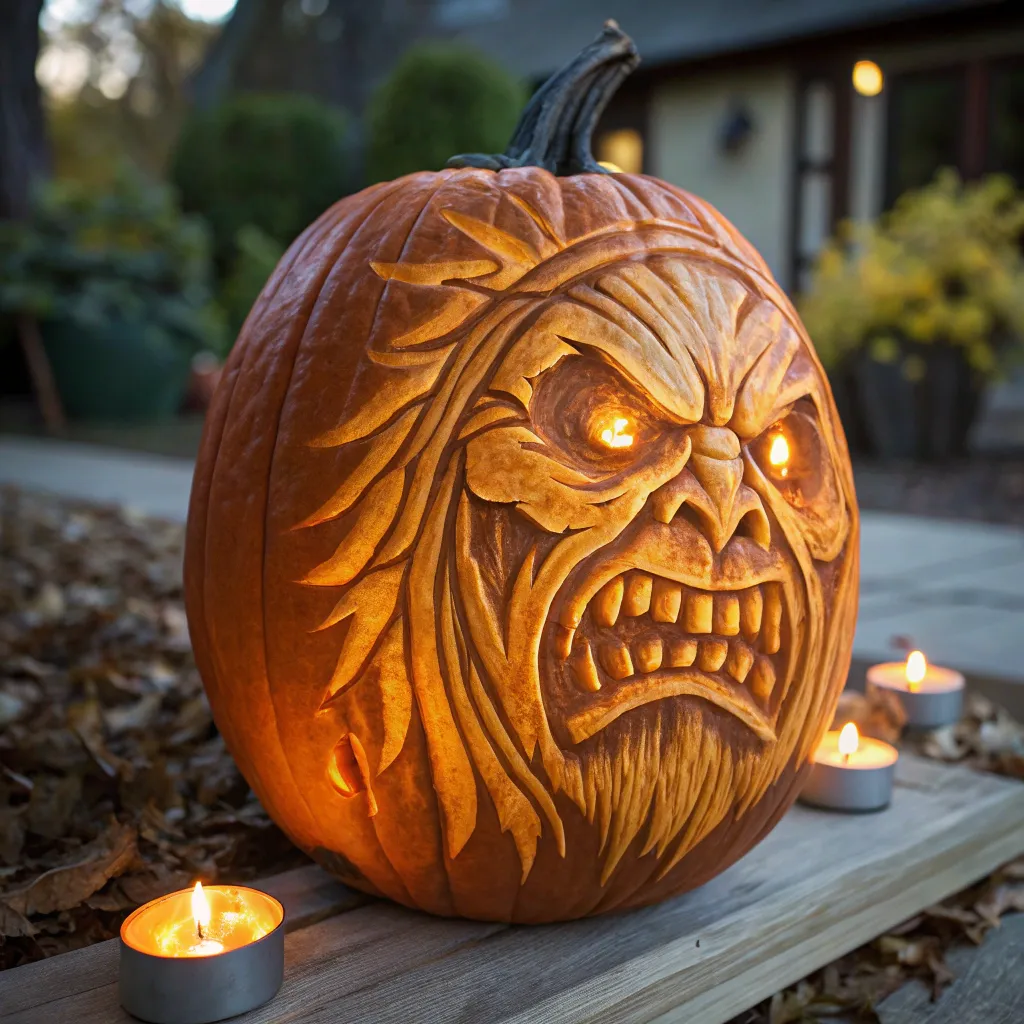
Realistic Portrait Techniques
Portrait carving represents the ultimate challenge, requiring understanding of facial proportions, light and shadow, and advanced shading techniques through varied flesh thickness. Start with high-contrast photographs and practice on paper first. Focus on capturing essential features rather than every detail. The key is identifying which elements are crucial for recognition and which can be simplified or suggested rather than explicitly carved.
Preservation and Display Tips for Long-Lasting Pumpkin Art
Extending the life of your carved masterpieces ensures your hard work can be enjoyed throughout the entire Halloween season and beyond.
Natural Preservation Methods
Apply petroleum jelly to all cut surfaces immediately after carving to seal in moisture and prevent rapid deterioration. Alternatively, create a mixture of water and a few drops of bleach (1 tablespoon bleach per quart water) to spray carved surfaces daily. This prevents mold growth and bacterial decay. Store carved pumpkins in cool, dry places when not displayed, and bring them indoors during extreme weather. With proper care, carved pumpkins can last 5-10 days compared to 2-3 days without preservation efforts.
Optimal Lighting Solutions
LED candles provide safer, longer-lasting illumination than traditional candles while producing less heat that can accelerate decay. Battery-operated string lights create multiple light points for complex designs with layered depth. For outdoor displays, solar-powered lights offer convenient, weather-resistant options that automatically illuminate at dusk.
Weather Protection Strategies
Position carved pumpkins under covered porches or overhangs to protect from direct rain and harsh sunlight. Create simple clear plastic covers for temporary weather protection, ensuring adequate ventilation to prevent condensation buildup. During freezing weather, move pumpkins indoors as freezing and thawing cycles dramatically accelerate deterioration.
Troubleshooting Common Pumpkin Carving Challenges
Even experienced carvers encounter problems, but knowing how to address common issues saves projects and reduces frustration.
Fixing Carving Mistakes
When you accidentally cut too far or make unwanted cuts, creative solutions can salvage your project. Small mistakes can be disguised by incorporating them into the design—turn accidental cuts into additional design elements or connect them to planned cuts. For larger errors, consider changing your design concept entirely or using the damaged area as inspiration for a different approach to your pumpkin carving ideas.
Dealing with Difficult Pumpkin Types
Some pumpkins have flesh that’s too thick, too thin, or inconsistent in texture. Thick-fleshed pumpkins require more aggressive carving tools and patience, while thin-fleshed varieties need gentler approaches to prevent accidental breakthrough. Always test carve a small hidden area first to understand your specific pumpkin’s characteristics before beginning your main design.
Rescue Techniques for Cracked Pumpkins
Hairline cracks can be stabilized with clear tape applied to the interior surface. Larger cracks might require design modifications to incorporate the crack as an intentional element. Prevention is key—choose pumpkins without soft spots or existing damage, and avoid pumpkins that have been exposed to freezing temperatures.
Frequently Asked Questions
What are the best pumpkin carving ideas for beginners?
Start with geometric constellation patterns, elegant silhouettes, and modern minimalist faces. These designs build confidence while teaching fundamental techniques. Focus on simple shapes with clean lines, avoid overly complex details, and always practice safety protocols. Geometric patterns are particularly forgiving because small imperfections don’t detract from the overall effect.
How long do carved pumpkins last with proper preservation?
With proper preservation techniques including moisture sealing and daily bleach solution spraying, carved pumpkins typically last 5-10 days in moderate weather conditions. Indoor storage during extreme weather and LED lighting instead of candles can extend this timeframe. Unpreserved pumpkins usually deteriorate within 2-3 days.
What tools do I need for genius pumpkin carving designs?
Essential tools include a quality carving kit with various sized saws, precision knives, scooping tools, and detail implements. Expect to invest $15-30 for a professional-quality kit. Additional helpful tools include clay sculpting implements, small drill bits for perfect holes, and good lighting for your workspace. Quality tools make complex designs achievable and improve safety.
Can children safely participate in advanced pumpkin carving ideas?
Children can safely participate with proper supervision and age-appropriate modifications. Young children can help with design planning, pumpkin cleaning, and simple surface scraping while adults handle all cutting tasks. Older children can use supervised carving with safety-designed tools specifically made for younger users. Always prioritize safety over complexity.
How do I fix a mistake while carving my pumpkin?
Small mistakes can often be incorporated into modified designs or disguised as intentional elements. For cuts that go too far, consider changing your design to work with the mistake. Large errors might require switching to completely different design concepts. Prevention through careful planning and gradual cutting helps avoid most mistakes.
What makes pumpkin carving ideas ‘genius’ compared to traditional designs?
Genius designs demonstrate creativity, technical skill, and visual impact beyond basic jack-o’-lantern faces. They often incorporate advanced techniques like depth carving, complex patterns, or unexpected design elements. The ‘genius’ factor comes from thoughtful planning, skillful execution, and results that surprise and delight viewers with their sophistication and artistry.
Conclusion
These 10 genius pumpkin carving ideas provide a complete progression from beginner-friendly designs to advanced masterpieces that will truly amaze your neighbors. By starting with geometric patterns and elegant silhouettes, building skills through intermediate techniques like layered depth carving, and eventually mastering advanced portrait and mandala techniques, you’ll develop the expertise to create stunning Halloween displays year after year.
Remember that safety should always be your top priority, proper tools make all the difference, and preservation techniques help your artistic efforts last throughout the Halloween season. Whether you’re creating simple constellation patterns or attempting complex 3D effects, the key is patience, practice, and embracing your creative vision.

Start with the beginner designs that match your comfort level, and don’t be afraid to experiment with your own creative variations. Share your carved masterpieces with neighbors and on social media to inspire others in their own pumpkin artistry journey. After completing your spectacular Halloween display, continue the seasonal celebration with delicious autumn treats like Try our caramel apple puff pastry dessert, Warm up with our hot apple dumplings recipe, or Make our easy pecan pie bark for Halloween to complete your perfect autumn celebration.