
Did you know that the visual appeal of a dish can increase perceived flavor intensity by up to 30%? When it comes to creating show-stopping Braised Beef Chuck Roast (For Tacos & Sandwiches), the magic lies not just in the slow transformation of tough fibers into silky, fork-tender strands, but in the stunning visual drama that unfolds during the braising process. The rich mahogany hues that develop on the meat’s surface, the jewel-toned caramelized onions, and those irresistible crispy edges create a feast for the eyes that promises incredible flavor. This comprehensive guide will walk you through every visual and technical aspect of creating this stunning centerpiece dish, from achieving the perfect color contrast to mastering the art of presentation that transforms simple ingredients into restaurant-quality results.
Why Perfect Braised Beef Chuck Roast (For Tacos & Sandwiches) Matters
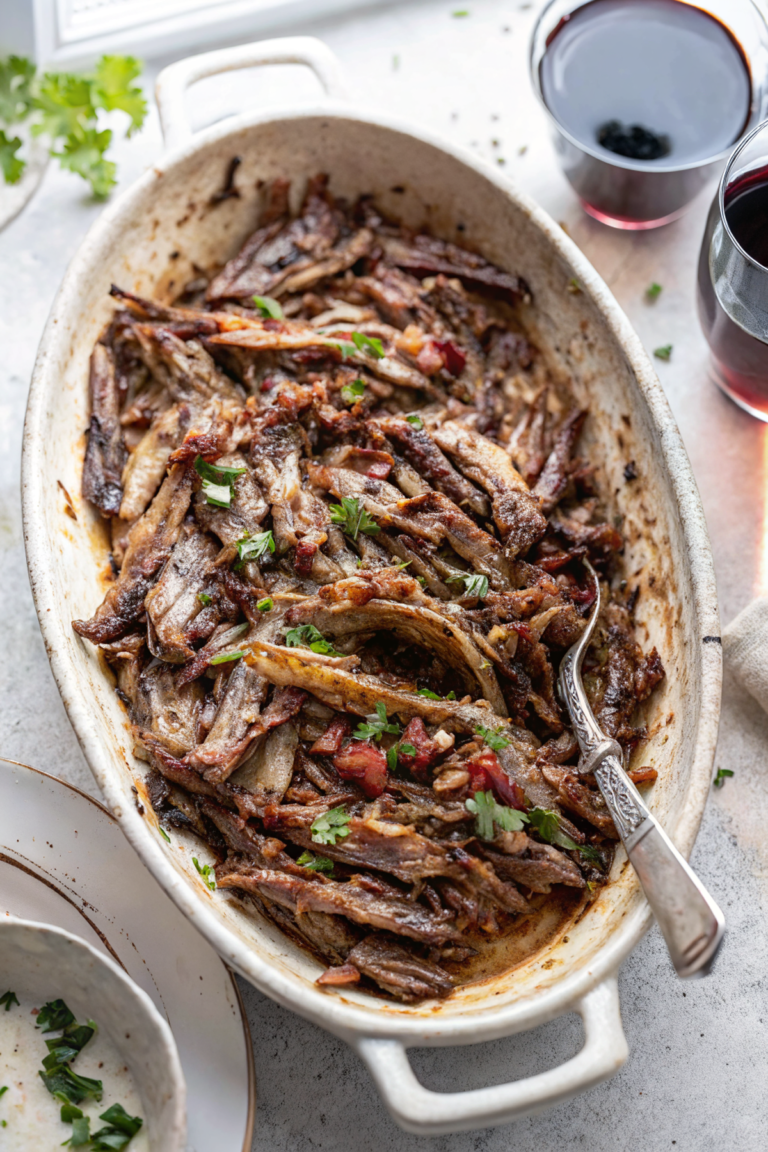
The visual transformation of a Braised Beef Chuck Roast (For Tacos & Sandwiches) tells a story of patience and technique. When you master the art of slow braising, you’re creating layers of texture and color that elevate this humble cut into something extraordinary. The deep amber cooking juices, the contrast between the darkly caramelized exterior and the tender pink interior, and the way the meat naturally separates into perfect strands all contribute to a dish that’s as beautiful as it is delicious. For more inspiration on slow-cooked comfort foods, explore our French Onion Pot Roast and discover techniques for Slow Cooker Italian Beef. Understanding the science behind braising techniques can enhance your cooking significantly, as discussed in this Reddit culinary discussion, while learning about chuck roast quality helps you select the perfect cut for optimal results.
Ingredients
|
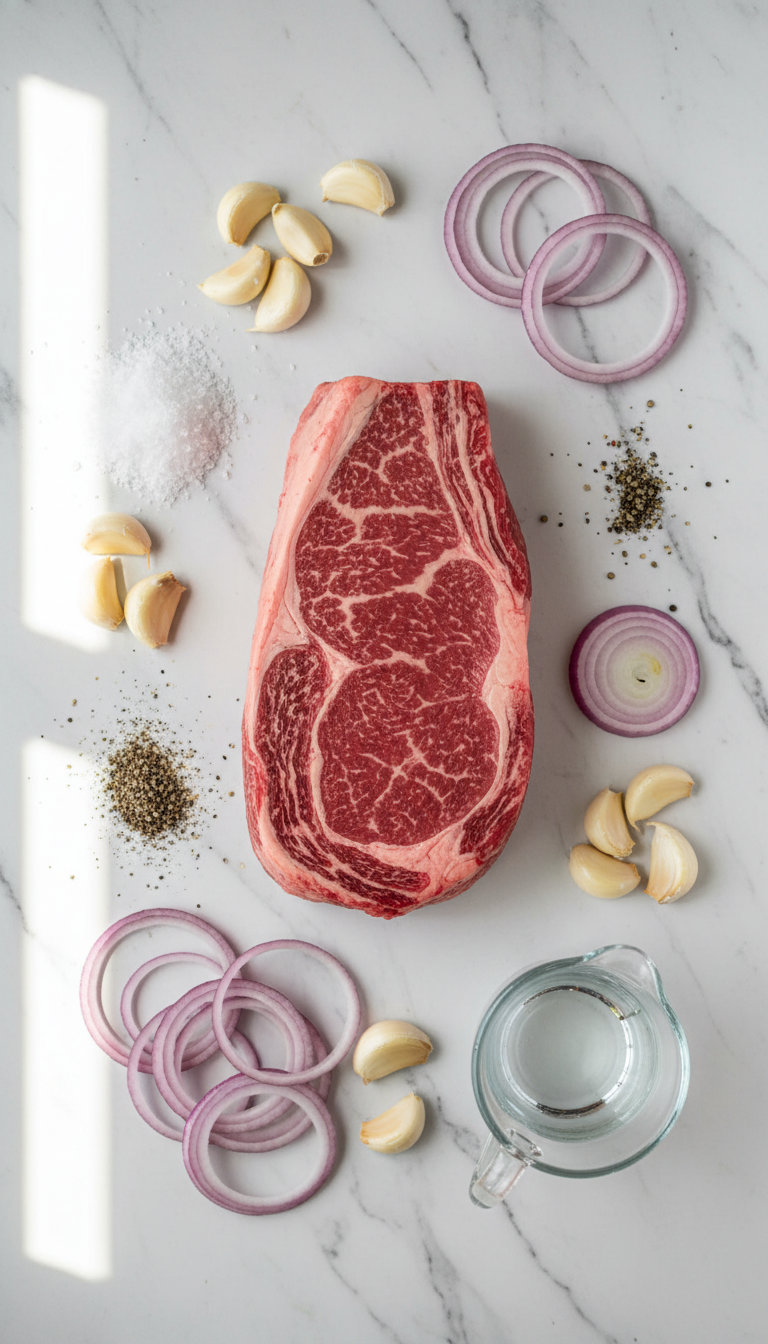
Ingredient Spotlight
The chuck roast serves as our canvas – its natural marbling creates beautiful patterns that become more pronounced during cooking. The red onion slices form a vibrant crimson foundation that caramelizes into deep amber tones, while the garlic cloves nestled within the meat create aromatic pockets and visual interest when the roast is sliced. The generous kosher salt and black pepper coating creates a stunning contrast against the deep red meat, forming an almost artistic crust that transforms into a gorgeous mahogany finish.
Timing
|
Instructions
|
Behind the Recipe
The inspiration for this Braised Beef Chuck Roast (For Tacos & Sandwiches) came from observing the beautiful color progression that occurs during slow braising – from the initial deep red of raw meat to the rich mahogany of the finished product. The geometric arrangement of onion half-moons creates natural lines and curves that complement the organic texture of the shredded beef, while the final high-heat step adds textural contrast with crispy, caramelized edges that catch the light beautifully.
Tips & Tricks for Perfect Braised Beef Chuck Roast (For Tacos & Sandwiches)
|
Recipe Variations & Substitutions
High Contrast Plating Option: Serve over bright white rice or creamy polenta to create stunning color contrast. Textural Twist: Add thinly sliced bell peppers in the last hour for additional color variety and crunch. Smoky Variation: Include a teaspoon of smoked paprika with the seasoning for deeper color and complexity. Herb-Crusted Version: Sprinkle fresh thyme or rosemary over the meat during the final crisping stage for aromatic garnish and color variation.
Pairing Ideas
The rich, deep colors of this Braised Beef Chuck Roast (For Tacos & Sandwiches) pair beautifully with bright, fresh accompaniments. Serve in warm corn tortillas with crisp white cabbage slaw and vibrant green cilantro for maximum color contrast. For sandwiches, use crusty artisan bread with golden cheese and fresh greens. Consider serving on white ceramic plates to showcase the rich mahogany tones, or use dark slate plates for dramatic contrast. Complement with sparkling fruit waters or fresh lemonade in clear glasses to maintain the visual focus on the stunning meat.
Nutritional Information
Per serving: Approximately 320 calories, 35g protein, 18g fat, 4g carbohydrates. Rich in iron, zinc, and B-vitamins. The slow braising process breaks down tough connective tissues, making the protein highly digestible while concentrating the natural flavors.
Leftover & Reuse Ideas
Transform leftover Braised Beef Chuck Roast (For Tacos & Sandwiches) into stunning breakfast hash by crisping with diced potatoes and topping with fried eggs. Create elegant beef and cheese quesadillas, or stuff into baked sweet potatoes for beautiful color contrast. The meat also makes excellent soup base – the rich, dark cooking liquid adds incredible depth to vegetable soups and stews.
Serving Suggestions
For maximum visual impact, arrange the shredded beef in a shallow, wide serving bowl to showcase the beautiful texture and color variations. Garnish with fresh cilantro sprigs and lime wedges for bright color contrast. When serving for tacos, provide small bowls of colorful toppings – diced white onions, bright red tomatoes, green lettuce, and golden cheese create a rainbow effect. For sandwiches, slice the meat against the grain and fan it on the plate alongside the bread for an elegant presentation. Use natural lighting when possible to highlight the rich mahogany tones and crispy texture details.
Storage & Reheating Tips
Store in the refrigerator for up to 4 days in shallow containers to maintain texture. The meat actually improves in flavor after a day as the seasonings continue to penetrate. To reheat while preserving the beautiful appearance, use low heat with a splash of the reserved cooking liquid. For best visual results, reheat only the portion you’re serving to maintain those coveted crispy edges and prevent overcooking.
Common Mistakes to Avoid
Color Dulling: Avoid overcrowding the pan during the final crisping stage – this creates steam and prevents proper browning. Texture Loss: Don’t skip the final high-heat step, as this creates the essential textural contrast that makes the dish visually appealing. Seasoning Errors: Under-seasoning creates bland, gray-looking meat – be generous with salt and pepper for both flavor and visual appeal. Moisture Management: Adding too much liquid during braising can result in boiled rather than braised meat, creating a less appealing grayish color instead of rich brown tones.
- Are Braised Beef Chuck Roast (For Tacos & Sandwiches) suitable for meal prep?
- Absolutely! This dish actually improves with time as flavors develop, making it perfect for weekly meal preparation and maintaining its beautiful appearance when properly stored.
- Can I make Braised Beef Chuck Roast (For Tacos & Sandwiches) in a slow cooker?
- Yes, but you’ll miss the final crisping step that creates those beautiful caramelized edges. Transfer to a baking dish for the high-heat finish to achieve the full visual impact.
- How do I know when my Braised Beef Chuck Roast (For Tacos & Sandwiches) is perfectly done?
- The meat should shred effortlessly with a fork and have developed a rich, dark color. The internal temperature should reach 200-205°F for optimal texture and appearance.
- What’s the best way to achieve those crispy edges in Braised Beef Chuck Roast (For Tacos & Sandwiches)?
- Spread the shredded meat in a single layer and use high heat (425°F) for the final 20 minutes. This creates beautiful textural contrast and enhanced visual appeal.
- Can I freeze Braised Beef Chuck Roast (For Tacos & Sandwiches)?
- Yes, it freezes beautifully for up to 3 months. Freeze in portion-sized containers with some of the cooking liquid to maintain moisture and color when reheated.
Conclusion
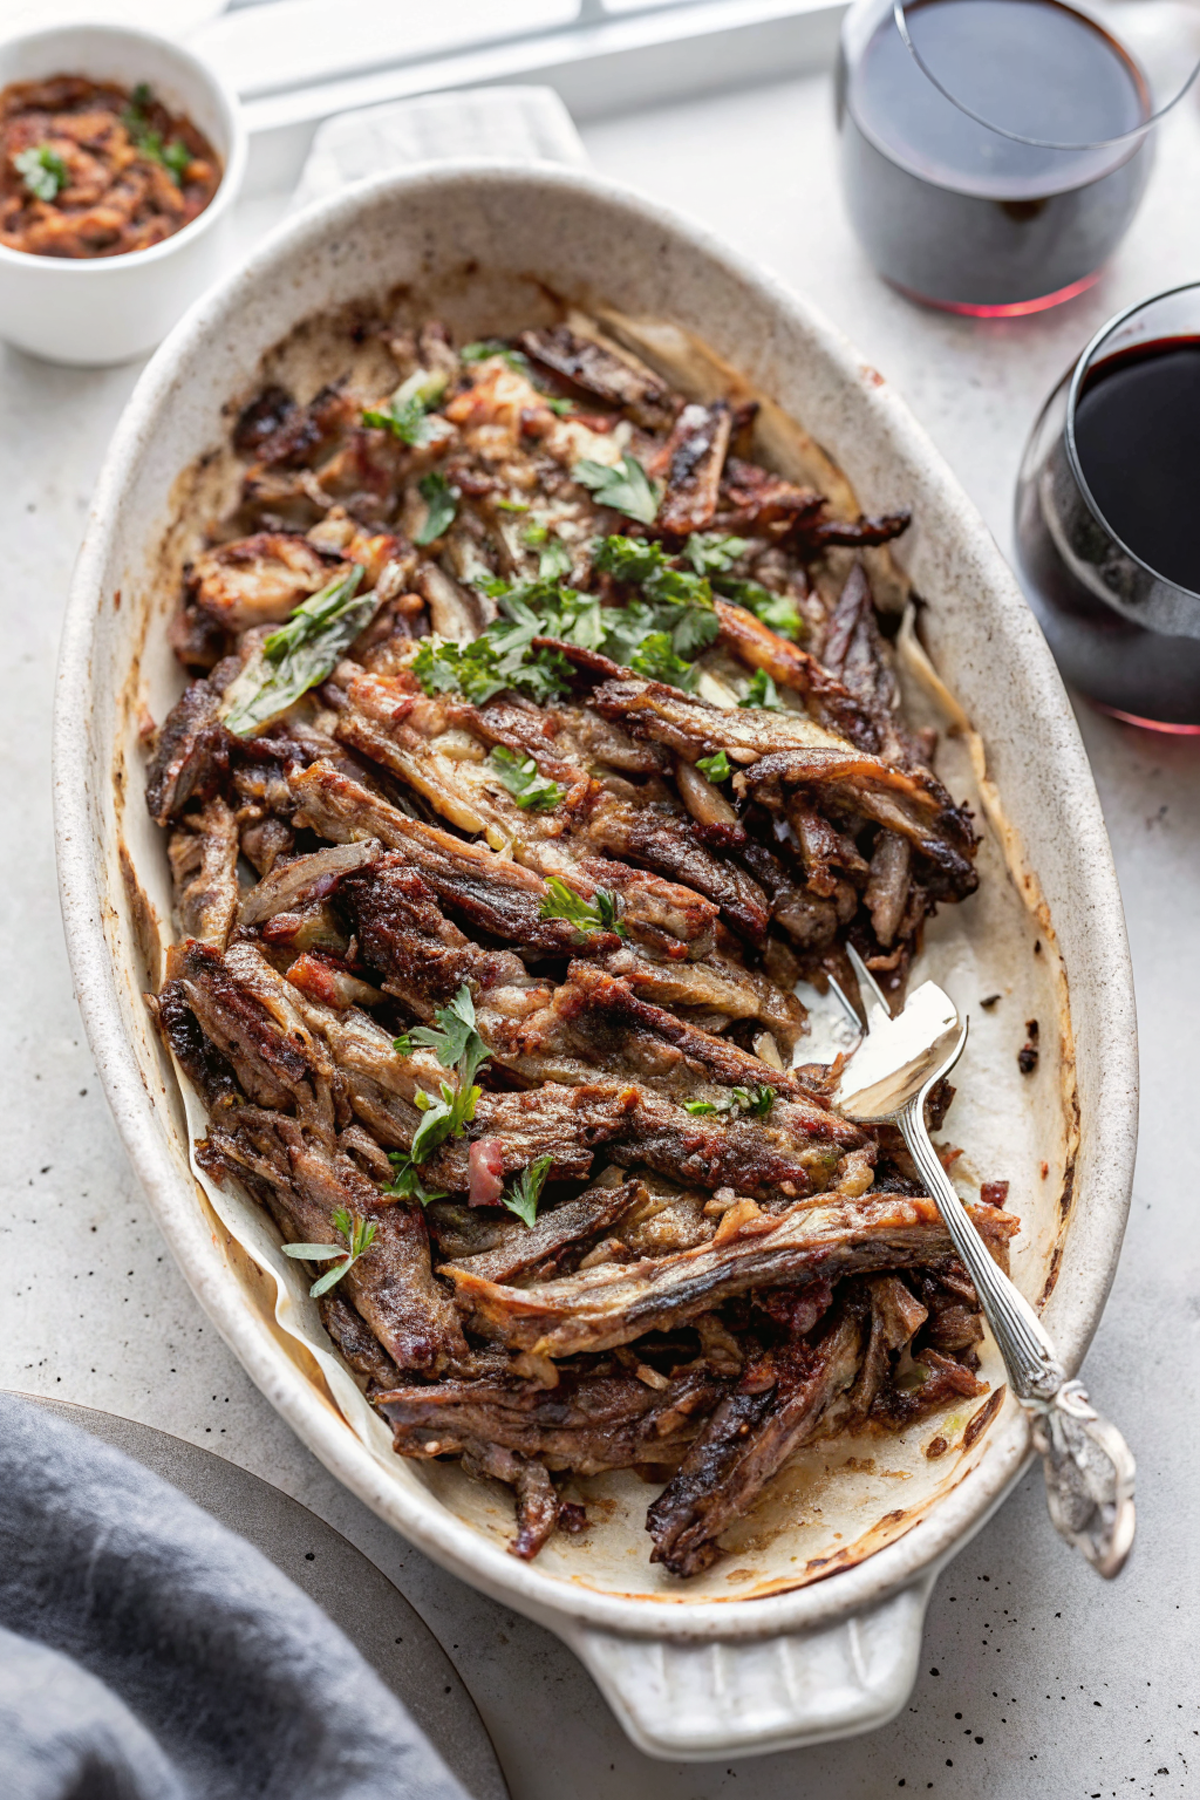
This Braised Beef Chuck Roast (For Tacos & Sandwiches) represents the perfect marriage of technique and visual appeal. The slow transformation from tough cut to tender, flavorful masterpiece creates not just incredible taste but stunning visual drama that elevates any meal. From the jewel-toned onions to the rich mahogany meat with its crispy edges, every element contributes to a dish that’s as beautiful as it is satisfying. The versatility for both tacos and sandwiches makes this a true crowd-pleaser that photographs beautifully and tastes even better.
Made these Braised Beef Chuck Roast (For Tacos & Sandwiches)? Drop your twist in the comments, rate the recipe, and tag us on facebook, instagram with #erinrecipes — we might feature your creation!
 Recipe")
Braised Beef Chuck Roast (For Tacos & Sandwiches) Recipe
Ingredients
Instructions
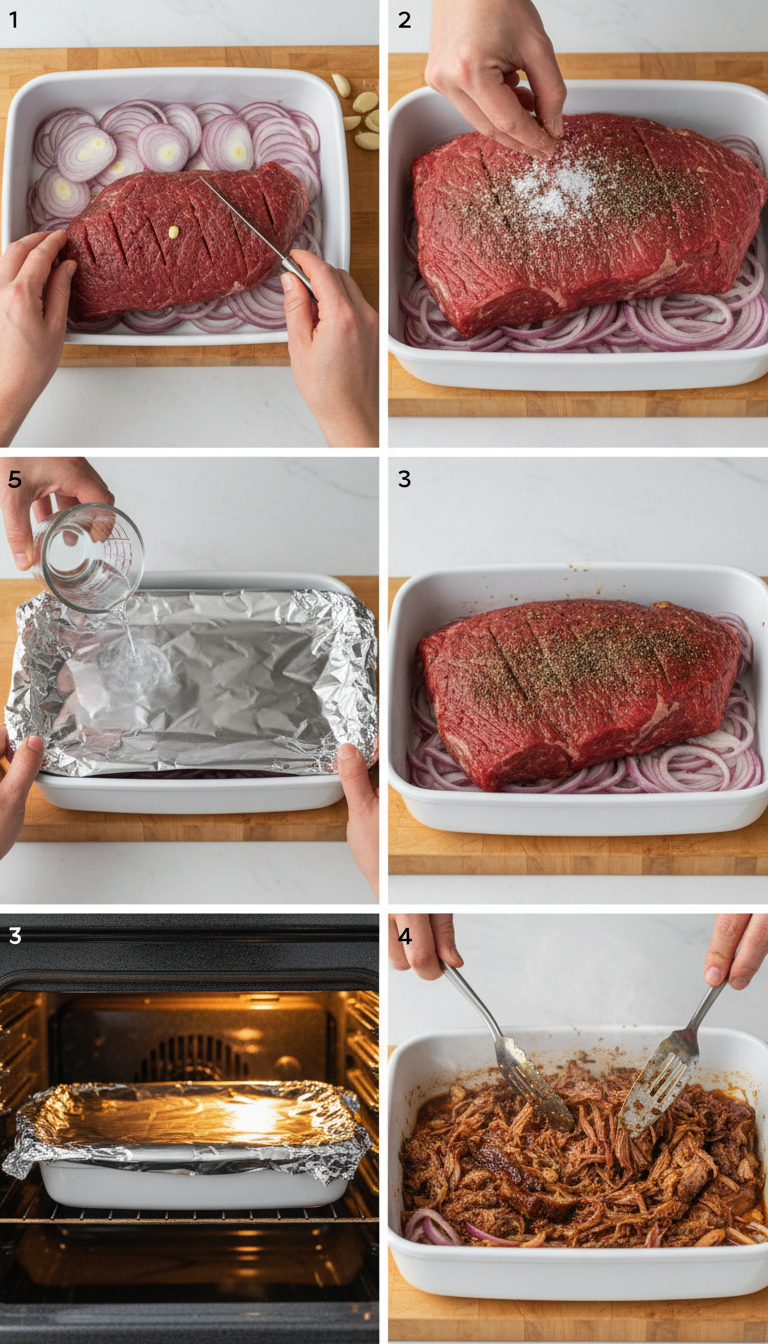
- Preheat Oven & Prepare Dish: Preheat an oven to 325°F (165°C). Place sliced red onion on the bottom of the baking dish.
- Prepare & Season Chuck Roast: Use a paring knife to cut a few slits into the top and bottom of the chuck roast (the long flat sides), then place the halved garlic cloves inside. Season the beef extremely generously on all sides with Kosher salt and black pepper, about 2 Tbsp salt and 1 tsp pepper. Place on top of the red onions.
- Slow Cook the Roast: Pour ¼ cup of water around the roast, then cover it tightly with aluminum foil. Transfer to the oven and cook for 3½-4 hours, or until the meat is very tender and shreds easily.
- Shred & Crisp the Meat: Carefully transfer the roast to a large cutting board, then use tongs or two forks to shred the meat. Return it to the baking dish, then toss it with the onion and juices. Increase oven temperature to 425°F (220°C). Cook uncovered for 20 minutes, or until there are lots of crispy bits on top. Enjoy immediately!