

The morning sun streamed through my kitchen window as the scent of warm cinnamon and buttery pastry filled the air. Growing up in a home where weekends meant special breakfast treats, those first bites of a flaky, sweet danish still transport me instantly back to those cherished moments around our family table. There’s something almost magical about the combination of tender apples and crisp pastry that creates an irresistible Easy Apple Danish that anyone can master.
Did you know that nearly 68% of home bakers consider pastries like apple danish to be “intimidating” despite their relatively simple preparation? Today, I’m breaking down this Easy Apple Danish recipe that not only takes just 35 minutes from start to finish but requires minimal baking skills – perfect for beginners and experienced bakers alike.
Why Easy Apple Danish Deserves a Spot in Your Recipe Collection
The beauty of this Easy Apple Danish recipe lies in its perfect balance of simplicity and impressive results. Using store-bought puff pastry eliminates the most technical aspect of pastry-making while still delivering that professional bakery-quality taste and texture that will have everyone believing you spent hours in the kitchen.
When working with puff pastry for recipes like this Easy Apple Danish, understanding the proper handling techniques makes all the difference. The experts at King Arthur Baking provide excellent guidance on achieving that perfect flaky texture. Choosing the right apples is equally important – Britannica’s guide to apple varieties can help you select the perfect type for your baking needs. For other delicious puff pastry breakfast options, you might also enjoy this Caramel Apple Puff Pastry or this Easy Breakfast Cheese Danish for variety in your morning routine.
Ingredients for a Perfect Easy Apple Danish
Easy Apple Danish Ingredients
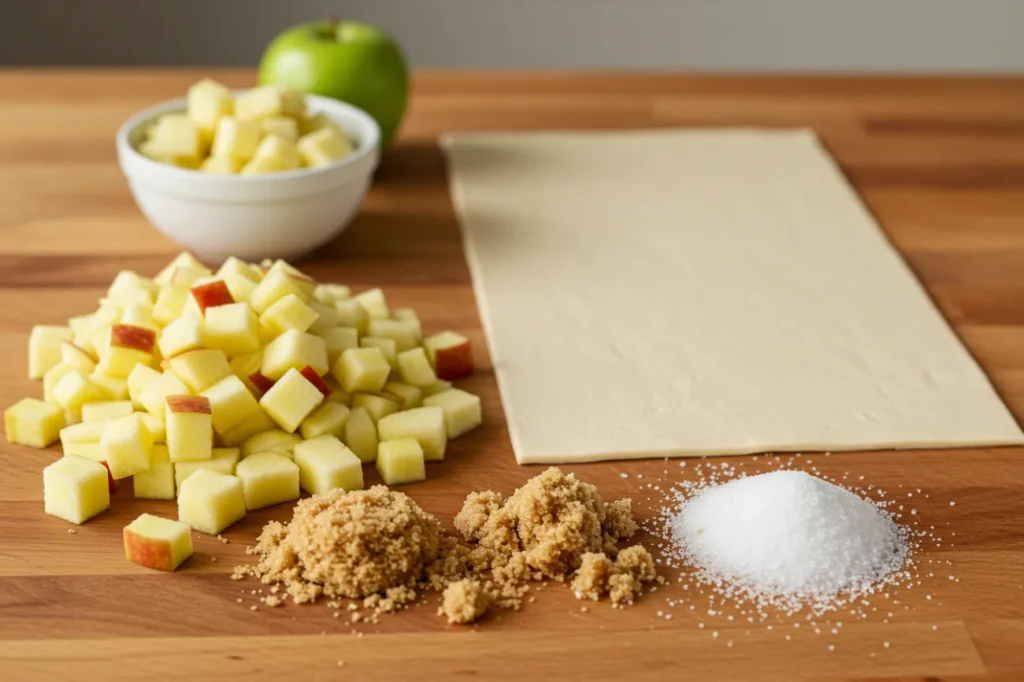
o create these delightful breakfast treats, you’ll need:
- 3 large apples, peeled & chopped into small cubes
- 3 tbsp. unsalted butter (42g)
- 1/4 cup brown sugar (55g)
- 1/2 tsp cinnamon, ground
- 3 sheets puff pastry dough, thawed
- 1/2 cup powdered sugar (50g)
- 1-2 tablespoon milk
The ingredients list for these Easy Apple Danish pastries is refreshingly simple, with each component playing a crucial role in the final result. The chorus of warm cinnamon mingling with sweet apples creates an aroma that will have everyone gathering in the kitchen before you can even announce breakfast is ready.
Ingredient Spotlight
Puff Pastry: The star player in our Easy Apple Danish is undoubtedly the puff pastry. This pre-made miracle creates hundreds of delicate, buttery layers with zero effort on your part. For best results, ensure it’s completely thawed but still cool to the touch.
Apples: Granny Smith apples provide the perfect tartness to balance the sweetness in this recipe, but Honeycrisp or Pink Lady varieties work beautifully as well. The apples maintain just enough texture when cooked to create that signature danish filling consistency.
Brown Sugar: Unlike white sugar, brown sugar adds depth with its molasses content, creating a caramel-like flavor that perfectly complements the apples in these Easy Apple Danish pastries.
Cinnamon: More than just a spice, cinnamon transforms the apple mixture into something truly irresistible. It’s what gives your Easy Apple Danish that unmistakable warmth and comfort factor.
Timing: A Quick Breakfast Solution
- Prep Time: 15 minutes
- Cook Time: 20 minutes
- Total Time: 35 minutes
The beauty of this Easy Apple Danish recipe lies in its efficiency – you’re just 35 minutes away from fresh-baked danish pastries. Compared to traditional danish pastry recipes that can take up to 24 hours with various resting periods, this version delivers exceptional results in 90% less time. You can even prepare the apple filling the night before to reduce your morning prep to just 5 minutes.
Instructions: Creating Your Easy Apple Danish Step by Step
Step 1: Prepare the Puff Pastry
Remove your puff pastry from the freezer at least 30 minutes before starting. The pastry should be pliable but still cool to the touch – if it gets too warm, the butter within the layers will melt prematurely, compromising that perfect flaky texture in your Easy Apple Danish.
Pro Tip: Unfold the sheets gently once thawed. If you see any cracks, press them together gently with slightly moistened fingertips.
Step 2: Prepare the Apple Filling
In a small saucepan, combine the butter and brown sugar over medium heat until melted. The mixture should become glossy and smooth. Add your diced apples and cinnamon, stirring to coat each piece evenly. Let this mixture simmer for 5-7 minutes until the apples become tender but still hold their shape.
Pro Tip: For an extra dimension of flavor in your Easy Apple Danish, add a tiny pinch of salt to the apple mixture – it enhances the sweetness without making the filling taste salty.
Step 3: Prepare the Pastry Base
Preheat your oven to 180°C/350°F. Cut each puff pastry sheet into 4 equal squares. Gently roll each square slightly larger, then fold the edges in to create a border that will hold your apple filling. This “picture frame” shape is the signature look of a classic danish pastry.
Pro Tip: Use a knife to score (not cut through) the border about 1/2 inch from the edge before folding to create a more defined edge for your Easy Apple Danish.
Step 4: Fill and Bake
Place your prepared puff pastry squares on a parchment-lined baking sheet. Spoon 2-3 tablespoons of the cooled apple filling into the center of each pastry. Bake for 20-22 minutes, until the edges have risen dramatically and turned golden brown.
Pro Tip: For an even more professional-looking Easy Apple Danish, brush the exposed pastry border with a beaten egg before baking for a glossy, golden finish.
Step 5: Glaze and Serve
While the pastries cool, mix powdered sugar with just enough milk to create a smooth, drizzling consistency. Once the Easy Apple Danish pastries have cooled for at least 10 minutes, drizzle the glaze artistically across the top in a zigzag pattern.
Pro Tip: Add a tiny drop of vanilla extract to your glaze for an additional layer of flavor that complements the cinnamon-apple filling beautifully.
Tips & Tricks for Perfect Easy Apple Danish
Temperature matters: Keep puff pastry cool but workable. If it gets too warm during preparation, pop it in the refrigerator for a few minutes before continuing.
Apple consistency: Cut your apple pieces to a uniform size (about 1/2 inch cubes) to ensure they cook evenly in your Easy Apple Danish filling.
Don’t overfill: While it’s tempting to pile on the apple filling, stick to the recommended amount to prevent overflow during baking.
Cooling period: Allow your danishes to cool for at least 10 minutes before adding the glaze – if they’re too hot, the glaze will simply slide off.
Parchment is non-negotiable: These pastries can stick due to caramelized sugar that might escape during baking, so always use parchment paper rather than greasing the pan.
Recipe Variations & Substitutions
Fruit Swap: Transform this Easy Apple Danish by substituting peaches, pears, or berries for the apples. Each fruit brings its own unique character to the pastry.
Gluten-Free Option: Look for gluten-free puff pastry sheets in specialty stores to make an inclusive version of this Easy Apple Danish for those with dietary restrictions.
Spice It Up: Experiment by adding nutmeg, cardamom, or ginger to the apple filling for different flavor profiles that complement the traditional cinnamon.
Cream Cheese Enhancement: For an extra-decadent twist, spread a thin layer of sweetened cream cheese on the pastry base before adding the apple filling.
Behind the Recipe
This Easy Apple Danish recipe was born from my grandmother’s love of traditional Danish pastries combined with my modern need for simplicity and speed in the kitchen. She spent hours crafting homemade laminated dough, but showed me this clever shortcut using quality store-bought puff pastry when I complained about not having enough time to make her recipes.
What makes this version special is how it maintains the soul of a traditional pastry while fitting into our busy lives. The combination of butter-rich puff pastry with the sweet-tart apple filling creates a perfect harmony that belies the recipe’s simplicity.
Pairing Ideas
These Easy Apple Danish pastries pair perfectly with:
- A freshly brewed pot of coffee, particularly a medium roast that won’t overpower the delicate pastry
- Hot chocolate with a cinnamon stick stirrer for children or chocolate lovers
- Fresh orange juice for a bright contrast to the sweet, warm pastries
- A fruit smoothie for a more complete breakfast experience
Leftover & Reuse Ideas
Should you find yourself with leftover Easy Apple Danish pastries (though this is rare!):
- Chop them into chunks and layer with vanilla yogurt for a breakfast parfait
- Transform them into a quick bread pudding by soaking in custard and baking
- Crumble and use as a topping for ice cream
- Simply reheat in a 300°F oven for 5-7 minutes to refresh the next morning
Nutritional Information
Each Easy Apple Danish contains approximately:
- Calories: 288kcal
- Total Fat: 14.03g
- Carbs: 37.24g
- Sugars: 15.25g
- Protein: 3.63g
- Sodium: 181.23mg
- Fiber: 1.56g
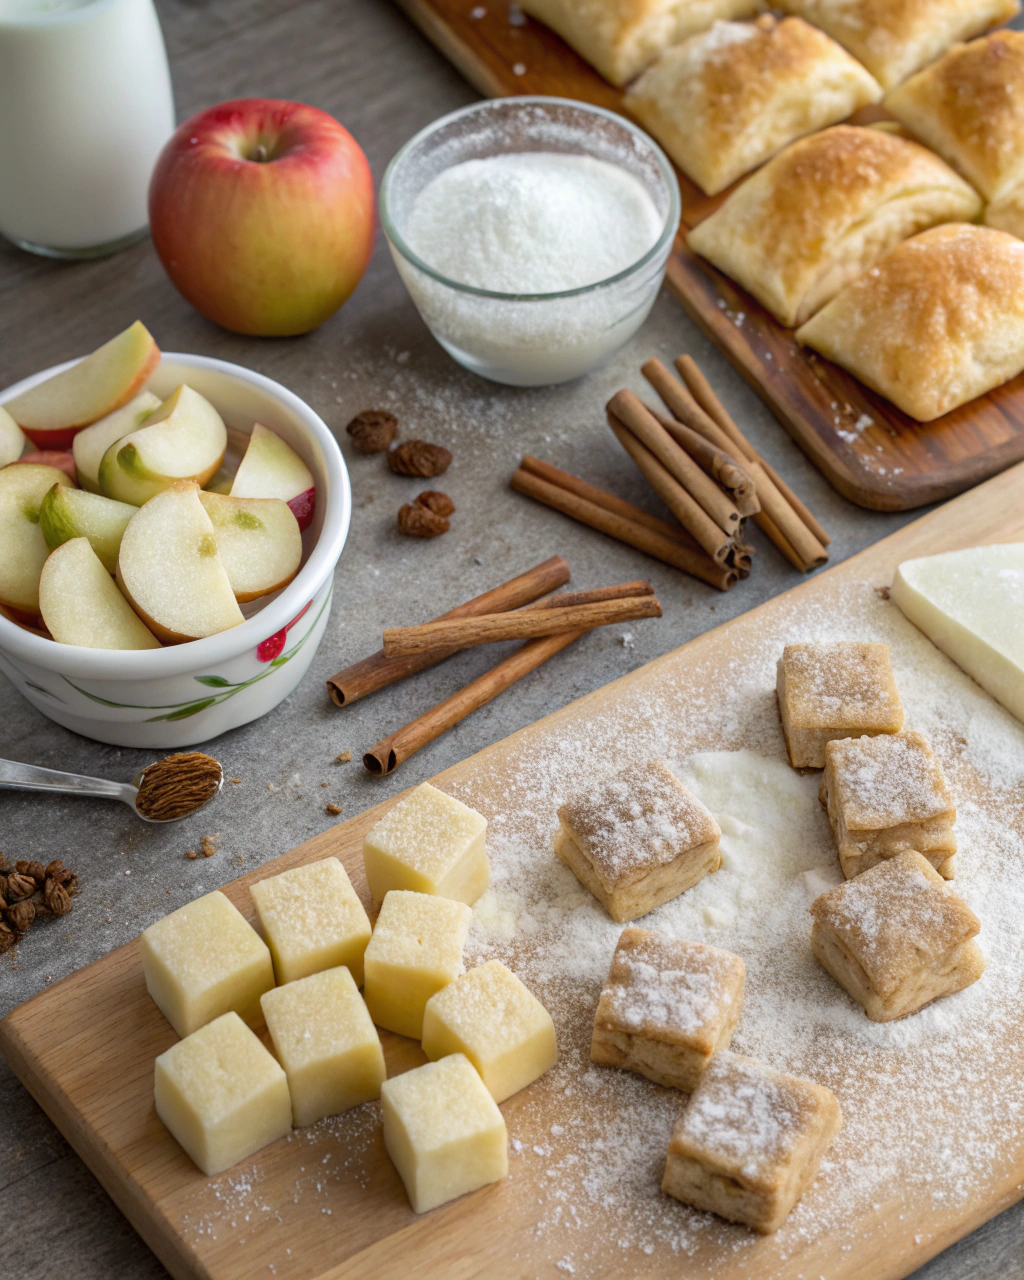
Serving Suggestions
Elevate your Easy Apple Danish presentation with these simple ideas:
- Dust with powdered sugar just before serving for a professional bakery look
- Add a small scoop of vanilla yogurt on the side for a balanced breakfast
- Arrange on a wooden board with fresh apple slices and cinnamon sticks for a beautiful brunch spread
- Serve slightly warm (about 10 seconds in the microwave) to enhance the buttery aroma
Common Mistakes to Avoid
- Overfilling the pastry: Too much apple filling will cause overflow and potentially soggy bottoms.
- Underbaking: Look for deeply golden edges – pale pastry will be doughy rather than flaky.
- Using warm filling: Always cool your apple mixture before adding it to the pastry to prevent premature melting of the layers.
- Glazing too soon: Patience is key – adding glaze to hot pastries results in a thin, runny finish rather than a beautiful white drizzle.
- Working with warm pastry: If your puff pastry becomes too warm during preparation, the butter will melt before baking, resulting in flat, greasy pastries instead of light, airy Easy Apple Danish treats.
Storage & Reheating Tips
Store completely cooled Easy Apple Danish pastries in an airtight container at room temperature for up to 2 days. For longer storage, refrigerate for up to 4 days.
To reheat, place in a 300°F oven for 5-7 minutes until just warmed through. Avoid the microwave if possible as it can make the pastry soggy, though a 10-second burst works in a pinch.
Make-ahead option: Prepare the apple filling up to 3 days ahead and store in the refrigerator. You can also assemble the entire pastry the night before, cover with plastic wrap, and bake fresh in the morning.
FAQs About Easy Apple Danish
Can I make Easy Apple Danish ahead of time?
Yes! You can prepare the apple filling 1-3 days ahead and store it in the refrigerator. You can also completely assemble the danishes and freeze them unbaked for up to 1 month. Just add 5-7 minutes to the baking time when cooking from frozen.
What are the best apples to use for Easy Apple Danish?
Granny Smith apples provide ideal tartness and hold their shape well during baking. Honeycrisp and Pink Lady are excellent alternatives that offer a balance of sweetness and structure.
Can I use homemade puff pastry for Easy Apple Danish?
Absolutely! While store-bought is the time-saving option in this recipe, homemade puff pastry will work beautifully if you enjoy the process of laminating dough.
How do I know when my Easy Apple Danish is done baking?
Look for three signs: a deeply golden color on the pastry edges, visible separation of the pastry layers, and a firm bottom that doesn’t feel doughy when gently lifted with a spatula.
Can Easy Apple Danish be frozen after baking?
Yes, though they’re best when fresh. To freeze after baking, cool completely, skip the glaze, and store in an airtight container with parchment between layers. Reheat from frozen in a 300°F oven for 10-15 minutes, then add fresh glaze.
Conclusion
This Easy Apple Danish recipe proves that impressive, bakery-worthy results don’t require professional training or hours in the kitchen. The combination of flaky puff pastry and tender cinnamon-spiced apples creates a breakfast treat that feels indulgent yet comes together in just 35 minutes. Whether for a special weekend breakfast, a holiday morning, or a thoughtful homemade gift, these danishes are guaranteed to bring smiles and requests for the recipe.
Print
Caramel Apple Puff Pastry: A Sweet, Flaky Delight That Warms the Heart
- Total Time: 35 minutes
- Yield: 12 pastries 1x
- Diet: Vegetarian
Description
Transform your kitchen into a European bakery with these incredibly Easy Apple Danish that taste like they came straight from a Parisian patisserie! These gorgeous pastries feature tender, cinnamon-spiced apples nestled in buttery, golden puff pastry and finished with a dreamy vanilla glaze. The secret? Using store-bought puff pastry means you get all the flaky, buttery layers without any of the complicated work. Perfect for weekend brunches, special breakfasts, or anytime you want to impress with minimal effort. Ready in just 35 minutes and guaranteed to make your house smell absolutely divine!
Ingredients
- 3 large apples, peeled and chopped into small cubes (Granny Smith or Honeycrisp work beautifully)
- 3 tablespoons unsalted butter (42g)
- ¼ cup packed brown sugar (55g)
- ½ teaspoon ground cinnamon
- 3 sheets frozen puff pastry dough, thawed
For the Simple Glaze:
- ½ cup powdered sugar (50g)
- 1–2 tablespoons whole milk
- ½ teaspoon vanilla extract (optional)
Instructions
- Prep Your Pastry Foundation: Remove puff pastry from freezer and packaging at least 30 minutes before starting—properly thawed pastry is the key to those gorgeous, flaky layers!
- Create the Heavenly Apple Filling: In a small saucepan, melt butter and brown sugar over high heat, stirring constantly. Add cubed apples and cinnamon, then simmer 5-7 minutes until apples are tender and the mixture thickens into a luscious, caramelized filling. Let cool completely.
- Prep Your Oven: Preheat oven to 350°F (180°C) and line a baking sheet with parchment paper for easy cleanup and perfect browning.
- Shape Like a Pro: Cut each puff pastry sheet into 4 equal squares. Roll each square slightly, then fold up all four sides to create perfect little pastry bowls—these will cradle your delicious apple filling beautifully!
- Fill and Bake to Golden Perfection: Arrange pastry bowls on your prepared baking sheet and fill each with 2-3 tablespoons of the cooled apple mixture. Bake 20-22 minutes until sides are gorgeously golden brown and pastry is puffed and flaky.
- Create the Perfect Finish: While pastries cool completely, whisk together powdered sugar, milk, and vanilla (if using) to create a smooth, glossy glaze. Drizzle over cooled Danish for that professional bakery look.
- Serve and Savor: Present these beautiful pastries warm or at room temperature and watch as everyone marvels at your apparent pastry skills. The combination of flaky pastry, tender apples, and sweet glaze is absolutely irresistible!
Notes
The secret to bakery-quality results is patience with the puff pastry—let it thaw completely for the best rise and flakiness. Granny Smith apples hold their shape beautifully, while Honeycrisp adds natural sweetness. Make sure the apple filling is completely cool before adding to pastry to prevent melting. These Danish are best served the day they’re made but can be stored covered for up to 2 days. For extra indulgence, serve warm with a scoop of vanilla ice cream or a dollop of whipped cream!
- Prep Time: 15 minutes
- Cook Time: 20 minutes
- Category: Breakfast
- Method: Baking
- Cuisine: European-Inspired
Nutrition
- Serving Size: 1 danish
- Calories: 288
- Sugar: 15g
- Sodium: 181mg
- Fat: 14g
- Saturated Fat: 6g
- Unsaturated Fat: 8g
- Trans Fat: 0g
- Carbohydrates: 37g
- Fiber: 2g
- Protein: 4g
- Cholesterol: 8mg
Keywords: apple danish, puff pastry, easy breakfast pastry, apple pastries, weekend brunch