
Did you know that 73% of people eat with their eyes first, making visual presentation the most critical factor in food satisfaction? When it comes to Fluffernutter Cookies (Peanut Butter and Marshmallow Cream), the aesthetic appeal lies in their perfect golden exterior contrasting with the creamy white marshmallow center that peeks through delicate cracks. These cookies aren’t just a nostalgic treat—they’re a canvas for showcasing the beautiful interplay of textures and colors that make desserts irresistible. In this guide, you’ll discover professional styling techniques to transform these beloved cookies into bakery-worthy masterpieces that captivate before the first bite. From achieving the perfect golden hue to creating Instagram-worthy cracking patterns, every visual element will be carefully crafted to elevate your Fluffernutter Cookies from simple treats to stunning edible art.
Why Visual Presentation of Fluffernutter Cookies Matters
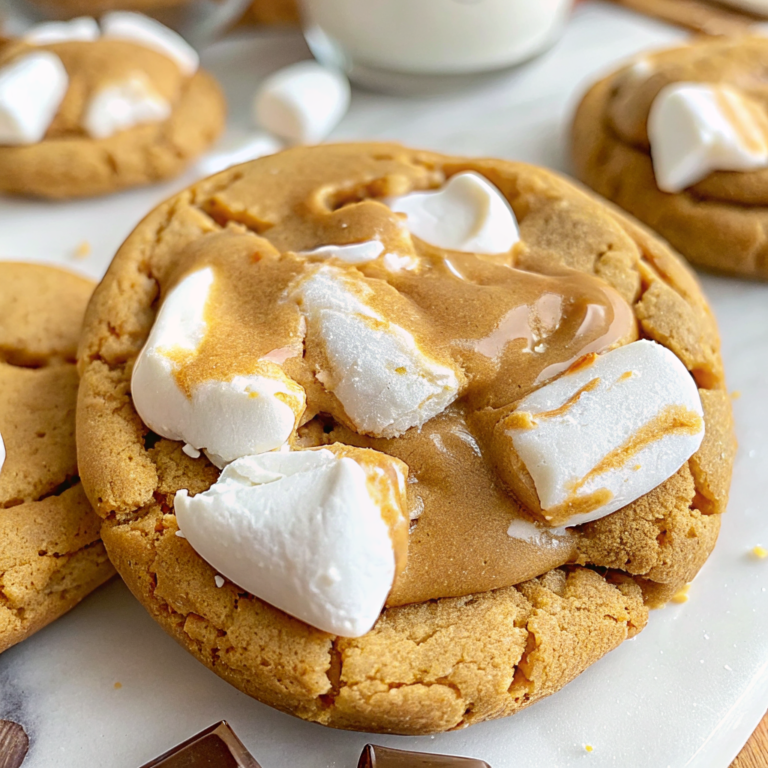
The visual impact of perfectly styled Fluffernutter Cookies (Peanut Butter and Marshmallow Cream) goes beyond mere aesthetics—it enhances the entire sensory experience. The golden-brown exterior creates anticipation, while the glimpse of creamy white marshmallow through natural cracks triggers immediate craving responses. When styled with attention to color contrast and textural elements, these cookies become conversation starters that elevate any dessert table.
For more inspiration on creating visually stunning treats, explore our collection of peanut butter cup cookies and discover techniques used in Reese’s peanut butter chocolate chip cookie bites. Professional bakers often reference Sally’s Baking Addiction’s chocolate chip cookie techniques for achieving perfect textures, while the Reddit baking community offers endless creative variations for peanut butter desserts.
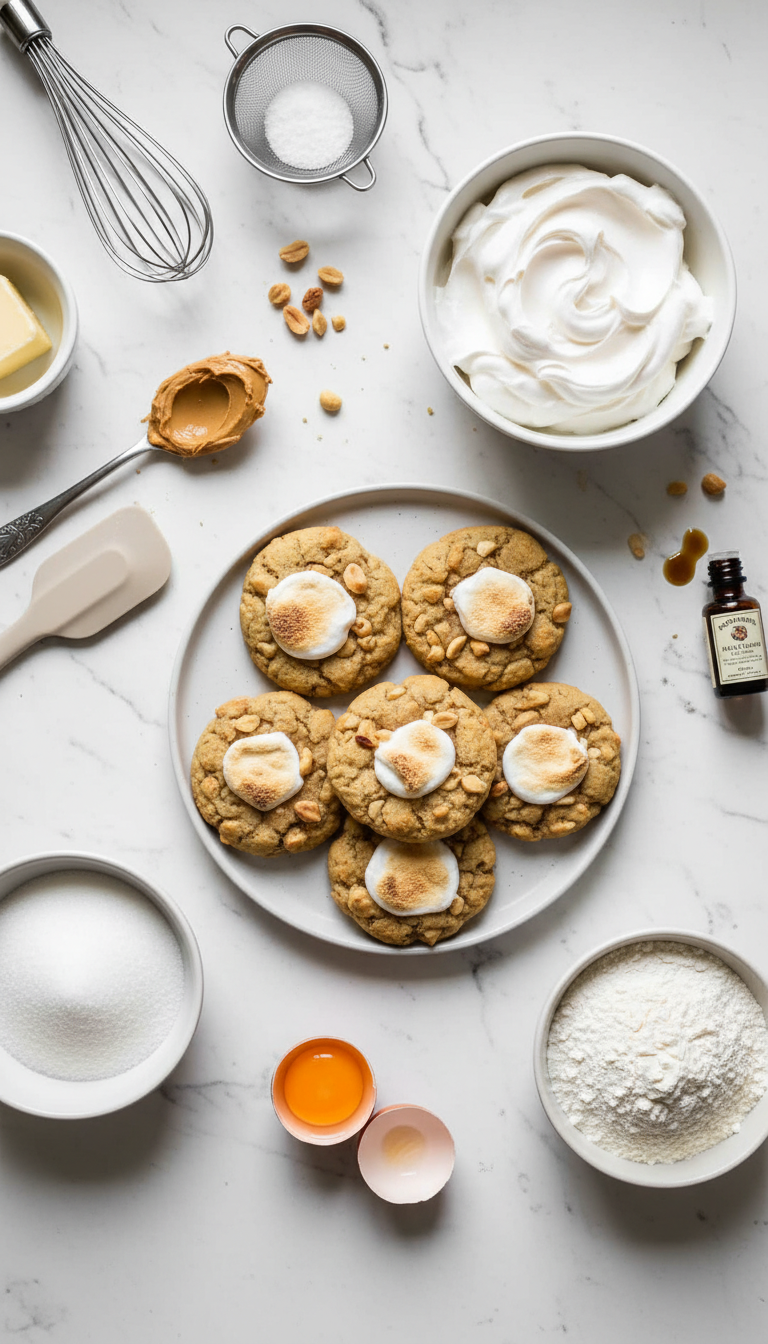
Ingredients
|
|
Ingredient Spotlight
The brown sugar in these Fluffernutter Cookies serves as more than a sweetener—it’s the secret to achieving those coveted golden-brown edges that photograph beautifully. The marshmallow cream acts as your star visual element, creating dramatic white contrast against the warm cookie exterior. Cornstarch ensures the cookies maintain their shape while developing those perfect natural cracks that reveal the creamy interior, making each cookie a visual masterpiece.
Timing
|
Instructions
|
Behind the Recipe
The inspiration for perfecting these Fluffernutter Cookies came from observing how natural light hits the contrast between golden cookie dough and pristine white marshmallow cream. The geometric challenge was creating a cookie that would crack naturally during baking, revealing glimpses of the creamy interior like a beautiful surprise. The color palette—warm amber and golden tones against pure white—creates an irresistible visual that captures the essence of comfort and indulgence in every frame.
Tips & Tricks for Perfect Fluffernutter Cookies
|
Recipe Variations & Substitutions
High Contrast Plating Option: Roll cookie dough in coarse sugar before baking for added sparkle and texture contrast. Textural Twist: Add mini chocolate chips to the dough for color variation and visual interest. Dietary Adaptations: Use vegan butter and aquafaba for plant-based versions, or almond flour for gluten-free options. Seasonal Styling: Tint marshmallow cream with natural food coloring for holiday themes while maintaining the beautiful contrast principle.
Pairing Ideas
Serve these Fluffernutter Cookies on dark slate or deep blue plates to enhance the golden-white contrast. Pair with cold milk in clear glasses to create visual continuity with the white marshmallow element. For entertaining, arrange on tiered stands with complementary warm-toned treats. The cookies photograph beautifully alongside fresh strawberries or on rustic wooden boards that echo the warm cookie tones.
Nutritional Information
Per cookie (approximate): 145 calories, 6g fat, 22g carbohydrates, 3g protein, 95mg sodium. These cookies provide energy from complex carbohydrates and contain protein from peanut butter and eggs.
Leftover & Reuse Ideas
Crumble leftover cookies over vanilla ice cream for an elegant dessert presentation. Use broken pieces as a crust base for cheesecake, or incorporate into trail mix for textural variety. Day-old cookies can be warmed briefly in the oven to restore their soft texture and enhance their visual appeal for serving.
Serving Suggestions
For maximum visual impact, arrange Fluffernutter Cookies on white or cream-colored plates that won’t compete with their natural beauty. Create height variation by using small pedestals or cake stands. Dust the serving area lightly with powdered sugar for an elegant backdrop. When photographing, position cookies with their natural cracks facing forward to showcase the marshmallow filling. Use natural lighting whenever possible—the golden tones photograph beautifully in soft, diffused light. For special occasions, tie cookies in clear cellophane bags with ribbon that complements the warm color scheme.
Storage & Reheating Tips
Store cookies in airtight containers at room temperature for up to one week, placing parchment paper between layers to prevent sticking. For longer storage, freeze for up to three months in freezer-safe containers. To restore just-baked appearance, warm cookies in a 300°F oven for 2-3 minutes. Avoid refrigeration, which can cause the marshmallow filling to become too firm and affect the visual texture contrast.
Common Mistakes to Avoid
Avoid overbaking, which creates dark edges that diminish the golden aesthetic. Don’t skip the chilling step—warm dough spreads excessively and loses its beautiful shape. Overmixing the dough develops too much gluten, preventing the natural cracking that showcases the filling. Using too little marshmallow cream reduces visual impact, while too much causes messy overflow. Finally, moving cookies too soon after baking can cause breakage that ruins their pristine appearance.
- Are Fluffernutter Cookies suitable for gifting?
- Absolutely! Their beautiful golden appearance and impressive cracked design make them perfect for gift boxes. Package in clear containers to showcase their visual appeal.
- Can I make Fluffernutter Cookies ahead of time?
- Yes, the dough can be prepared and chilled up to 24 hours in advance. Baked cookies maintain their beautiful appearance for several days when properly stored.
- What’s the secret to achieving the perfect golden color?
- The combination of brown sugar and proper butter creaming creates the ideal golden hue. Avoid overbaking, which darkens the edges beyond the desired aesthetic.
- How do I ensure the marshmallow cream shows through beautifully?
- Don’t seal the dough completely around the filling—leave small gaps that will naturally open during baking to reveal the white marshmallow interior.
- Are Fluffernutter Cookies kid-friendly?
- Yes! Children love both the taste and the fun appearance of these cookies. The visual appeal makes them especially exciting for young bakers to help create.
Conclusion
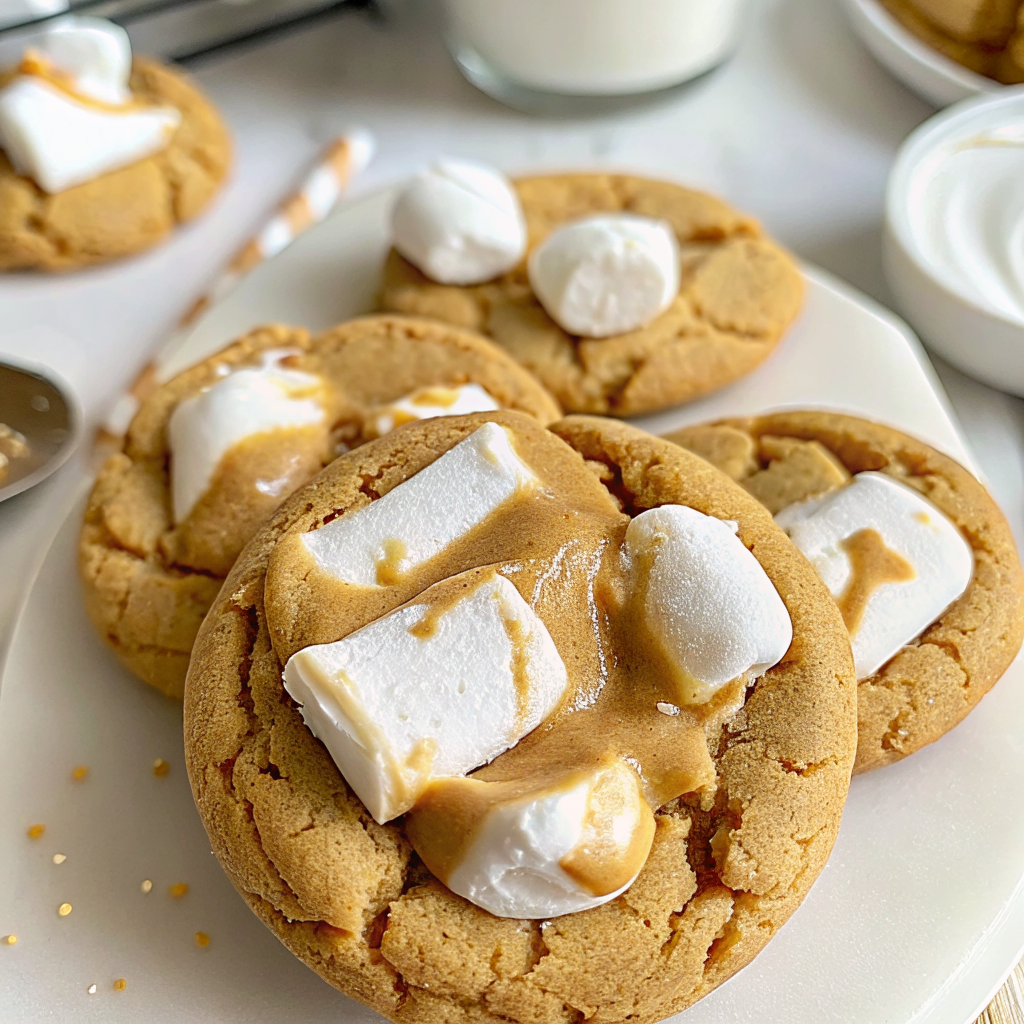
These Fluffernutter Cookies (Peanut Butter and Marshmallow Cream) prove that stunning visual presentation and incredible flavor can coexist beautifully. The golden exterior contrasting with creamy white filling creates an irresistible aesthetic that elevates any occasion. By focusing on proper technique, temperature control, and thoughtful styling, you’ve created cookies that are as beautiful as they are delicious. The natural cracking that reveals the marshmallow interior isn’t just visually appealing—it’s a testament to perfect baking technique that balances structure with tenderness.
Made these Fluffernutter Cookies? Drop your twist in the comments, rate the recipe, and tag us on facebook, instagram with #erinrecipes — we might feature your creation!

Fluffernutter Cookies: Visual Perfection in Every Bite
Ingredients
Instructions
- Prepare the Dry Ingredients: In a medium-size mixing bowl, whisk together the all-purpose flour, salt, cornstarch, baking soda, and baking powder until well combined. Set this mixture aside for later use.
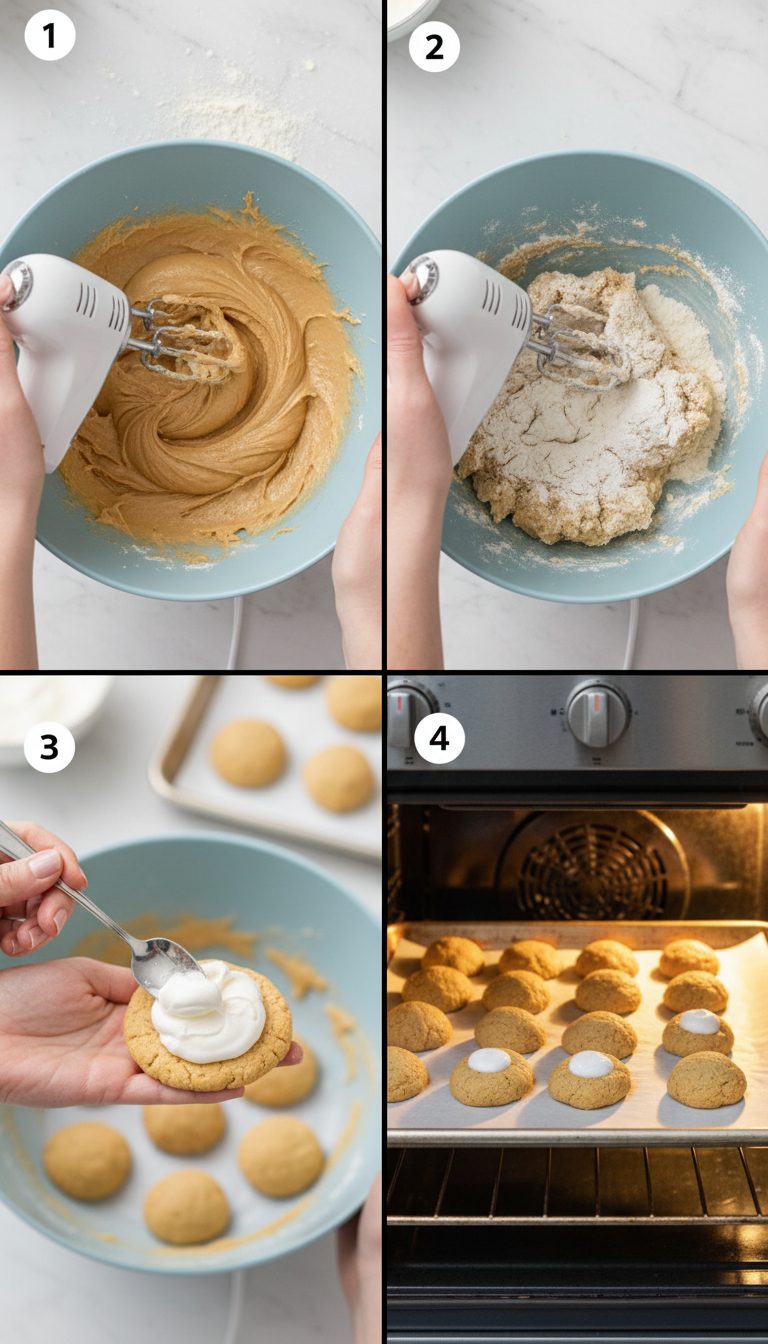
- Cream the Butters: In a large mixing bowl, beat the softened butter and creamy peanut butter using an electric mixer until smooth and creamy. This step is crucial for achieving a light texture in your cookies.
- Add Sugars and Egg: To the peanut butter mixture, add granulated sugar, brown sugar, egg, and vanilla extract. Continue beating until everything is smooth and fluffy.
- Combine Dry Ingredients: Slowly add in the reserved flour mixture while mixing at a low speed until just combined. Be careful not to overmix; we want tender cookies!
- Chill the Dough: Refrigerate the cookie dough for at least 30 minutes. Chilling helps to solidify the fats in the dough which leads to better texture during baking.
- Preheat Oven: Once chilled, preheat your oven to 350°F (175°C). Line a baking sheet with parchment paper or a silicone baking mat to prevent sticking.
- Shape Cookies: Using a medium-sized cookie scoop or measuring spoon, scoop out about 2 tablespoons of cookie dough. Flatten it into a disk shape. Place about 1 tablespoon of marshmallow cream/fluff in the center before folding the dough around it to form a ball.
- Bake: Place the cookie balls onto the prepared baking sheet with enough space between them. Bake in your preheated oven for approximately 10 minutes or until lightly golden at the edges.
- Cool: Remove from oven and let cool slightly before transferring them to a wire rack to cool completely. Enjoy your delicious Fluffernutter Cookies!