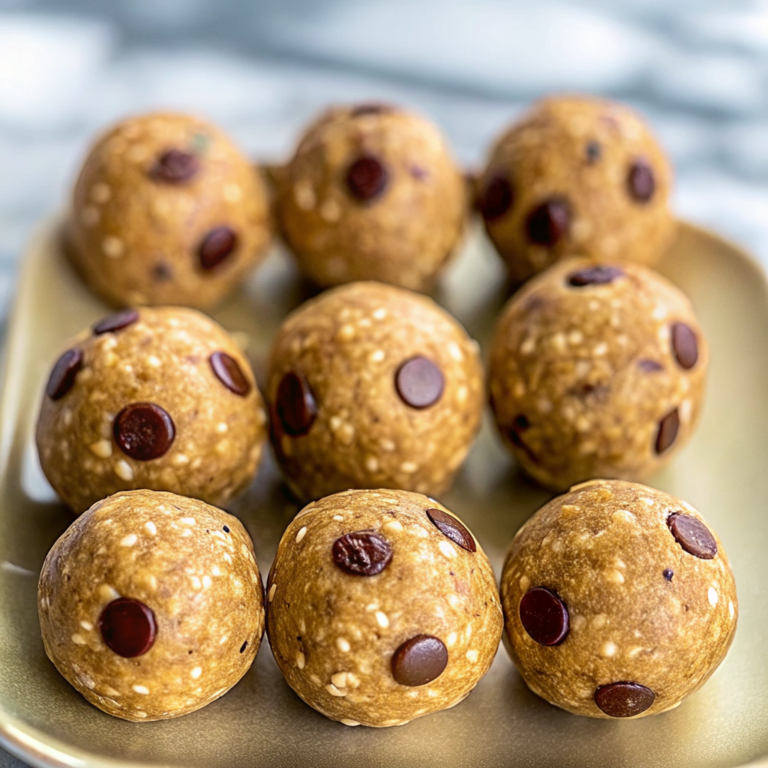
Are you searching for a snack that delivers both convenience and nutrition without compromising on taste? Recent studies show that 73% of people struggle to find satisfying snacks that align with their busy lifestyles and wellness goals. No Bake Protein Balls offer the perfect solution – a simple, nutritious treat that takes just minutes to prepare and provides lasting energy throughout your day. These delightful energy bites combine the rich flavors of peanut butter and chocolate with the power-packed benefits of protein powder and oats. Whether you’re rushing between meetings, need a post-workout refuel, or want a wholesome afternoon pick-me-up, these versatile no bake protein balls deliver satisfaction in every bite. You’ll discover how six simple ingredients transform into your new favorite snack that’s both kid-approved and adult-loved.
Why No Bake Protein Balls Matter
In today’s fast-paced world, finding nutritious snacks that don’t require extensive preparation has become essential for maintaining energy levels and supporting active lifestyles. These protein-packed energy bites offer a convenient solution that fits seamlessly into busy schedules while delivering the sustained fuel your body craves. For more delicious no-bake treats, explore our collection of no bake chocolate chip cookie dough bars and discover additional energy-boosting options in our pineapple coconut no bake balls recipe. According to nutrition experts at Healthline’s comprehensive snack guide, protein-rich snacks help maintain stable blood sugar levels and promote satiety. Additionally, The Best No-Bake Dessert Recipes showcase how simple ingredients can create satisfying treats without the need for baking equipment or extended preparation time.
Ingredients for Perfect No Bake Protein Balls
|
Ingredient Spotlight: What Makes These No Bake Protein Balls Special
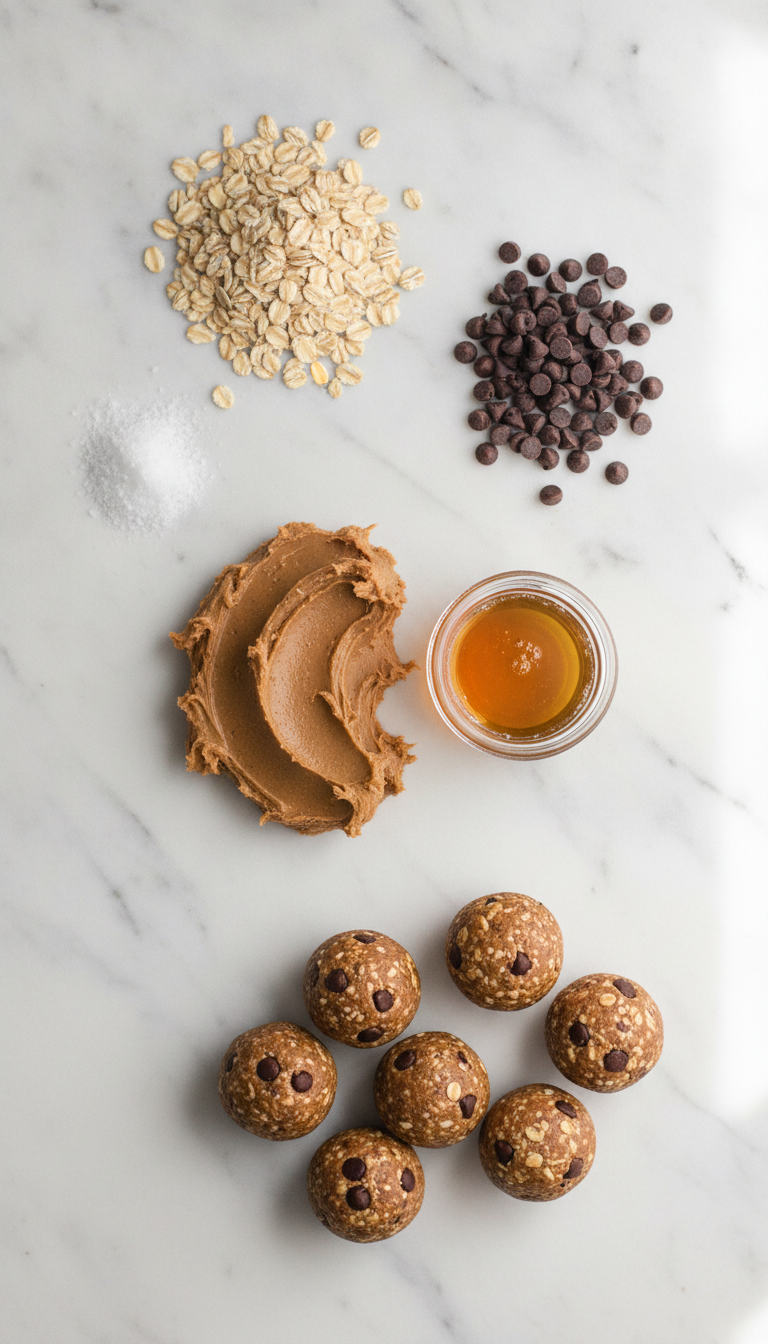
Each ingredient in these no bake protein balls serves a specific purpose in creating the perfect texture and flavor balance. The creamy peanut butter acts as both the primary binding agent and flavor base, providing healthy fats and natural protein. Honey contributes natural sweetness while helping to bind the mixture together, creating that ideal chewy consistency. Old fashioned oats add fiber, texture, and sustained energy release, making these balls more filling than typical sweet snacks. The vanilla protein powder boosts the nutritional profile significantly, transforming a simple treat into a functional snack that supports muscle recovery and satiety. A pinch of salt enhances all the flavors, preventing the sweetness from becoming overwhelming, while mini chocolate chips provide delightful bursts of indulgence that make these energy bites irresistible to both children and adults.
Timing and Preparation
|
Step-by-Step Instructions
|
Tips & Tricks for Perfect No Bake Protein Balls
|
Recipe Variations & Substitutions for No Bake Protein Balls
Chocolate Lover’s Version: Replace vanilla protein powder with chocolate protein powder and add 2 tablespoons of cocoa powder for intense chocolate flavor.
Tropical Twist: Substitute coconut flakes for chocolate chips and use coconut protein powder, adding a tablespoon of lime zest for brightness.
Nut-Free Alternative: Use sunflower seed butter instead of peanut butter and replace chocolate chips with dried fruit like cranberries or raisins.
Breakfast Bowl Balls: Add 2 tablespoons of chia seeds and use cinnamon protein powder, incorporating dried blueberries for a morning-inspired treat.
Behind the Recipe
The inspiration for these no bake protein balls came from the need for a snack that could satisfy both nutrition goals and taste preferences without requiring any special equipment or lengthy preparation time. After experimenting with various ratios of binding agents and mix-ins, this combination emerged as the perfect balance of convenience, nutrition, and indulgence. The beauty lies in their simplicity – just six pantry staples transform into a snack that rivals expensive store-bought energy bars while costing a fraction of the price. These energy bites represent the perfect marriage of wholesome ingredients and satisfying flavors, proving that nutritious eating doesn’t require sacrifice or complicated recipes.
Perfect Pairing Ideas
These versatile no bake protein balls pair beautifully with various beverages and complementary snacks. Enjoy them with a tall glass of cold milk for a classic combination, or pair with herbal tea for an afternoon energy boost. Fresh fruit like apple slices or berries create a balanced snack plate, while a smoothie makes an excellent post-workout companion. For special occasions, serve alongside other no-bake treats or include them in a healthy dessert spread. The mild sweetness and protein content make them an ideal pre-workout snack when paired with a banana or post-workout recovery food when enjoyed with chocolate milk.
Leftover & Reuse Ideas
Transform leftover no bake protein balls into exciting new treats by chopping them up and folding into homemade granola or yogurt parfaits. Crumble them over ice cream for a nutritious topping, or press the mixture into a pan to create energy bars instead of individual balls. Blend a few balls into smoothies for added protein and flavor, or incorporate chopped pieces into pancake or muffin batter for protein-packed breakfast options. The mixture can also be reformed into different shapes – try making energy squares, logs, or even pressing into silicone molds for fun themed shapes that kids will love.
Nutritional Information
Each no bake protein ball contains approximately 145 calories, 8 grams of protein, 6 grams of healthy fats, and 12 grams of carbohydrates including 2 grams of fiber. The combination of protein powder, peanut butter, and oats provides sustained energy release, making these balls an excellent choice for maintaining stable energy levels between meals. The natural sugars from honey offer quick energy, while the fiber content promotes satiety. These nutritional benefits make them suitable for various dietary needs, from post-workout recovery to afternoon energy maintenance.
Serving Suggestions
Present these no bake protein balls on a decorative plate for parties, or pack them individually in small containers for grab-and-go convenience. Roll some in coconut flakes, chopped nuts, or cocoa powder before chilling for an elegant presentation. Arrange them in a tiered serving tray alongside fresh fruit and nuts for a wholesome dessert spread. For lunch boxes, wrap individual balls in colorful cupcake liners to prevent sticking and add visual appeal. During holidays, dust with powdered sugar or roll in seasonal spices like cinnamon for festive flair.
Common Mistakes to Avoid
Over-mixing the ingredients can result in a paste-like texture that’s difficult to shape. Mix just until combined for the best consistency. Skipping the chilling step leads to balls that fall apart – patience during the firming process is essential for success. Using natural peanut butter with oil separation without stirring first creates uneven texture and binding issues. Making balls too large prevents proper chilling and makes them difficult to eat in one or two bites. Not adjusting for protein powder absorption can result in mixture that’s too dry or wet – different brands absorb liquids differently, so be prepared to make small adjustments.
Storage & Reheating Tips
Store no bake protein balls in an airtight container in the refrigerator for up to one week, or freeze for up to three months for longer storage. Layer between parchment paper to prevent sticking and maintain their shape. For freezer storage, place balls on a baking sheet to freeze individually before transferring to freezer bags – this prevents them from freezing together in one solid mass. Thaw frozen balls in the refrigerator for 2-3 hours before serving, or let them sit at room temperature for 15-20 minutes for a softer texture. No reheating is necessary, as these energy bites are designed to be enjoyed chilled or at room temperature.
Frequently Asked Questions
- Are no bake protein balls suitable for kids?
- Absolutely! These energy balls are kid-friendly and provide nutritious energy without artificial additives. The sweet flavor from honey and chocolate chips makes them appealing to children while delivering protein and fiber.
- Can I make no bake protein balls without protein powder?
- Yes, you can substitute the protein powder with additional oats, ground flaxseed, or chia seeds. The texture will be slightly different, but they’ll still be delicious and nutritious.
- How long do no bake protein balls need to chill?
- Minimum one hour for proper firmness, though they continue to improve in texture after 2-3 hours. For best results, chill overnight before serving.
- Are these no bake protein balls gluten-free?
- They can be! Use certified gluten-free oats and ensure your protein powder is gluten-free. All other ingredients are naturally gluten-free.
- What’s the best way to prevent no bake protein balls from being too sticky?
- Chill the mixture for 15-20 minutes before shaping, use slightly damp hands when rolling, and ensure proper ratios of dry to wet ingredients.
Conclusion
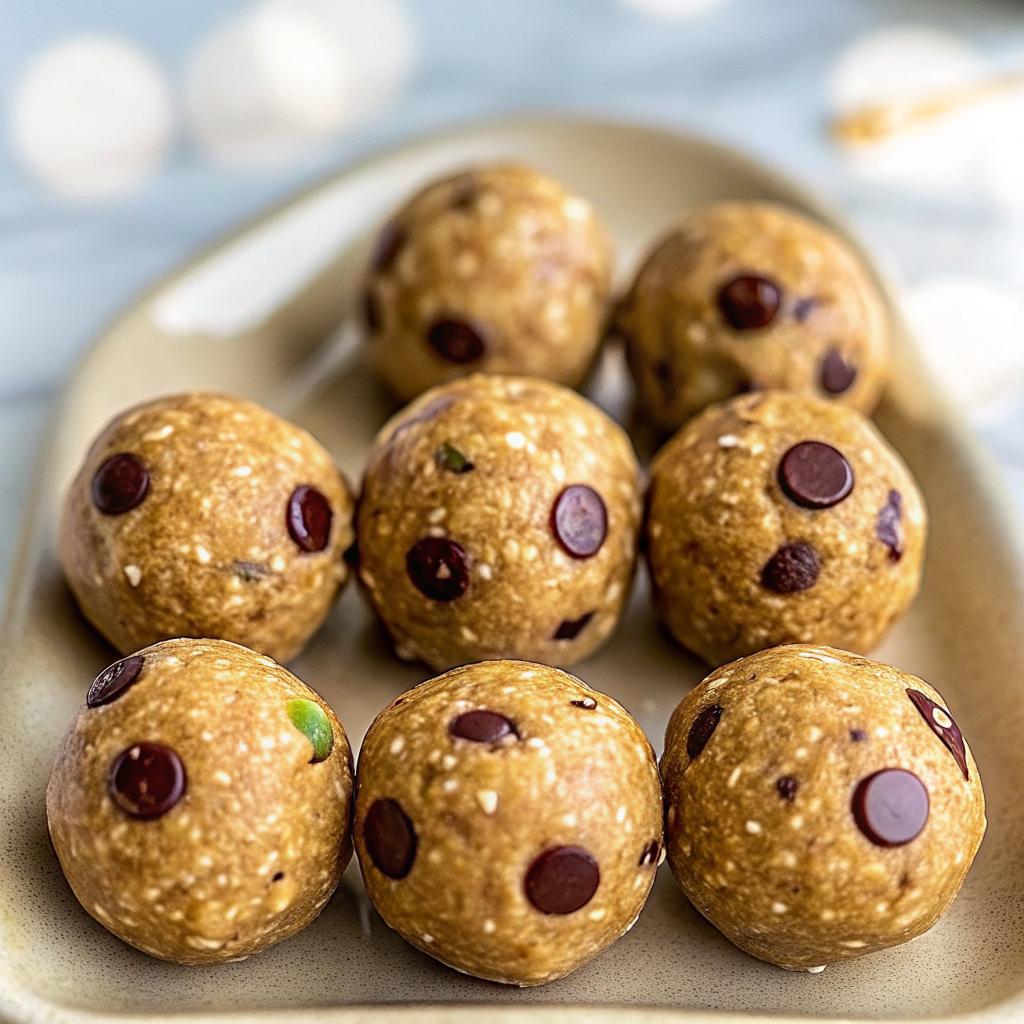
These no bake protein balls prove that nutritious snacking doesn’t require complicated recipes or extensive preparation time. With just six simple ingredients and ten minutes of active work, you can create a batch of energy-boosting treats that satisfy cravings while supporting your wellness goals. The versatility of this recipe means you can customize flavors to suit any preference, dietary restriction, or seasonal ingredient availability. Whether you’re meal prepping for a busy week, looking for post-workout fuel, or simply wanting a wholesome treat that both kids and adults will love, these protein-packed energy bites deliver on all fronts. The combination of convenience, nutrition, and delicious taste makes them a valuable addition to any recipe collection.
Made these No Bake Protein Balls? Drop your twist in the comments, rate the recipe, and tag us on facebook, instagram with #erinrecipes — we might feature your creation!
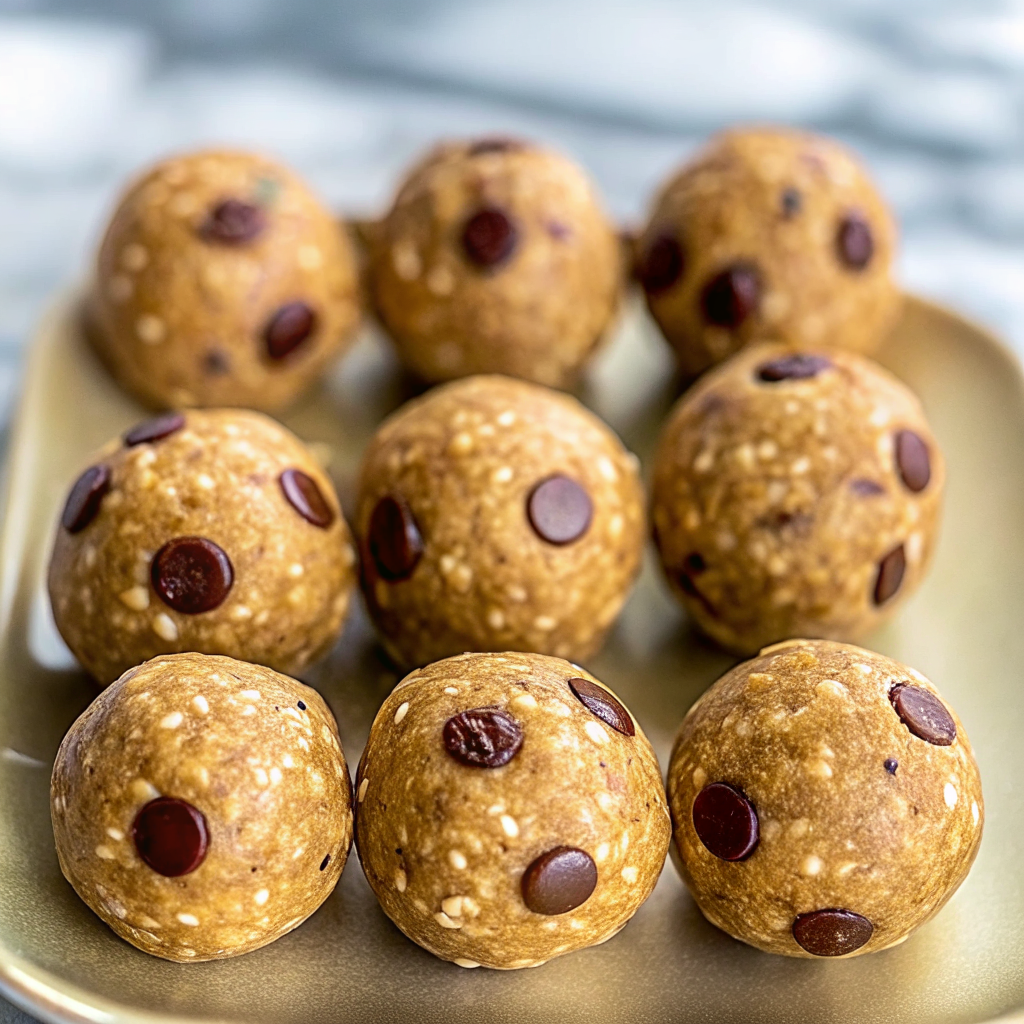
No Bake Protein Balls – Quick & Easy Energy Bites Recipe
Ingredients
Instructions
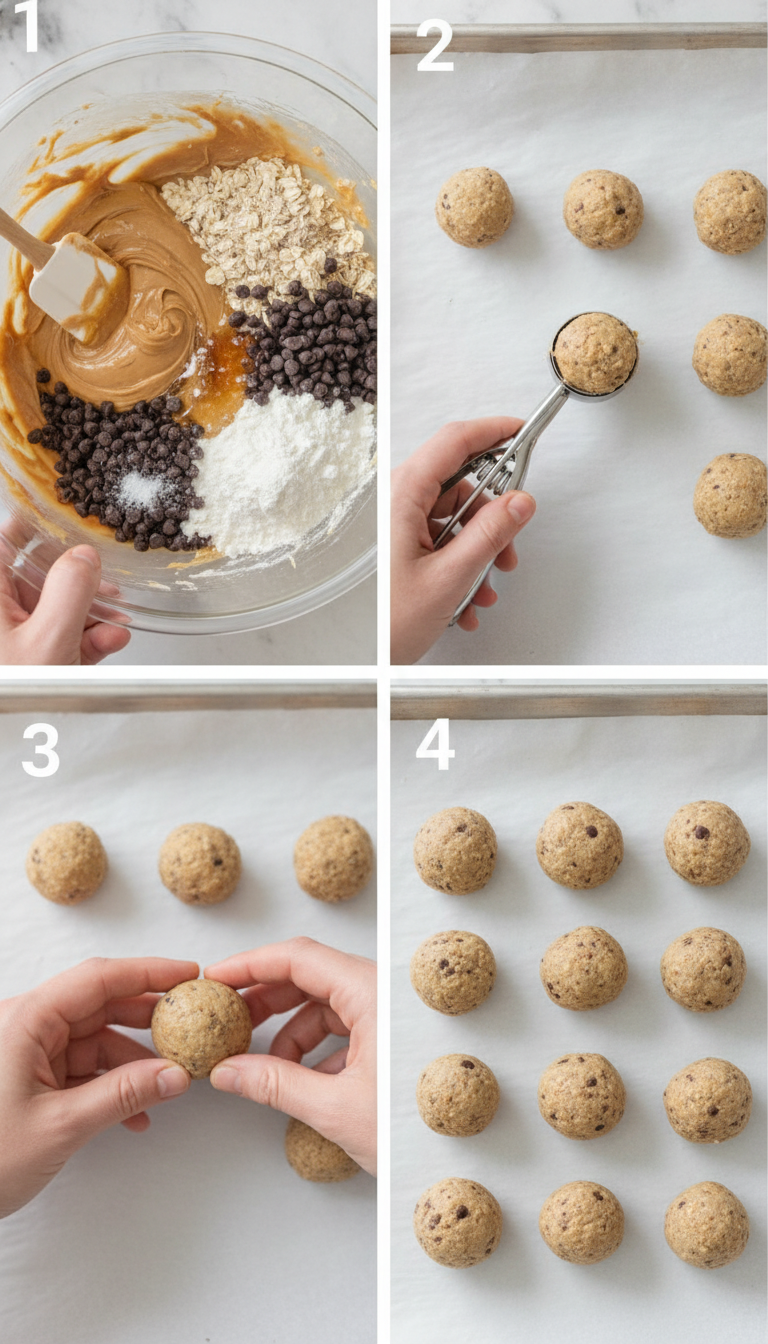
- Combine Ingredients: Add the no stir creamy peanut butter, honey, rolled oats, vanilla protein powder, salt, and mini chocolate chips to a mixing bowl. Use a rubber spatula to mix until everything is well combined.
- Shape Your Balls: Use a mini cookie scoop or a spoon to drop about one inch-sized portions onto a wax paper-covered cookie sheet.
- Roll into Balls: With your hands, roll each portion into a ball shape.
- Chill: Place the cookie sheet with your energy bites in the fridge for one hour or until they’re hardened.
- Store Your Snacks: Transfer your energy balls into a Ziploc bag. Store in the fridge for about a week or in the freezer for up to two to three months.